-
Announcement
Welcome to M1GC
-
Posts
1053 -
Joined
-
Last visited
-
Days Won
26
Content Type
Profiles
Forums
Gallery
Blogs
Store
Downloads
Events
Everything posted by M1GC
-
Publishing with FFMPEG The easiest way to publish live video streams is by using ffmpeg (or avconv). It's already installed on most systems and easy to install on others. RTMP supports only a limited number of codecs. The most popular RTMP video codecs are H264, Sorenson-H263 (aka flv) and audio codecs AAC, MP3, Nellymoser, Speex. If your video is encoded with these codecs (the most common pair is H264/AAC) then you do not need any conversion. Otherwise you need to convert video to one of supported codecs. We'll stream test file /var/videos/test.mp4 to server with ffmpeg. Below are some different examples of how to use FFMPEG To Stream Live Video. Streaming without conversion (given test.mp4 codecs are compatible with RTMP) ffmpeg -re -i /var/Videos/test.mp4 -c copy -f flv rtmp://localhost/myapp/mystream Streaming and encoding audio (AAC) and video (H264), need libx264 and libfaac ffmpeg -re -i /var/Videos/test.mp4 -c:v libx264 -c:a libfaac -ar 44100 -ac 1 -f flv rtmp://localhost/myapp/mystream Streaming and encoding audio (MP3) and video (H264), need libx264 and libmp3lame ffmpeg -re -i /var/Videos/test.mp4 -c:v libx264 -c:a libmp3lame -ar 44100 -ac 1 -f flv rtmp://localhost/myapp/mystream Streaming and encoding audio (Nellymoser) and video (Sorenson H263) ffmpeg -re -i /var/Videos/test.mp4 -c:v flv -c:a nellymoser -ar 44100 -ac 1 -f flv rtmp://localhost/myapp/mystream Publishing video from webcam (Linux) ffmpeg -f video4linux2 -i /dev/video0 -c:v libx264 -an -f flv rtmp://localhost/myapp/mystream Publishing video from webcam (MacOS) ffmpeg -f avfoundation -framerate 30 -i "0" -c:v libx264 -an -f flv rtmp://localhost/myapp/mystream Playing with ffplay ffplay rtmp://localhost/myapp/mystream OK NOW LETS MODIFY OUR CONFIG TO USE FFMPEG TO CONVERT OUR STREAM AND PUBLISH TO OUR PLATFORMS. Publishing a live stream to Restream.io & Facebook.com using FFMPEG This config is an example of how we will publish to multi-platforms using FFMPEG... rtmp { server { listen 1935; chunk_size 4096; application myapp { live on; #FFMPEG COPYING AND SENDING THE STREAM TO LIVEOUT exec ffmpeg -re -i "rtmp://127.0.0.1/myapp/YOURSTREAMKEY" -c:v libx264 -crf 0 -c copy -f flv "rtmp://127.0.0.1/liveout/YOURSTREAMKEY"; } application liveout { live on; record off; #LIVE OUT RECEIVING THE STREAM FROM ( myapp ) AND SENDING THE COPY OUT TO RESTREAM AND FACEBOOK #RESTREAM.IO DIRECT push rtmp://live.restream.io/live/YOUR_STREAM_KEY; #FACEBOOK DIRECT push rtmp://live-api-s.facebook.com:80/rtmp/YOUR_STREAM_KEY; } } } Lets explain whats happening in the code above The Live Application (myapp) will import your stream from your streaming software (OBS, XSplit, Wirecast) using ffmpeg. The myapp, will run the stream thru FFMPEG without conversion, using the x264 or x265 encoder, while copying the stream into a .FLV video format file. The .flv file is then sent to the liveout application all in real-time. (liveout), The liveout application (liveout) will receive a copy of your stream, and then pushed / sends your stream to any platform you listed to push too. That's it. ENJOY STREAMING WITH NGINX AND FFMPEG!
-
- 2
-

-
Feel free to Create a New Topic in this topic thread if you do not see a Video Creation / Editing Software you use and wish it to be added to the forum. Please Note: You can use the example below on how to submit with your request... EXAMPLE: Video Creation / Editing Software: Movie Maker 10 Description: Movie Maker 10 is a convenient video editing software for Windows for people looking to go back to basics. It’s great for making quick edits to short video clips you need ready right away. Movie Maker 10 comes with a free version that includes its suite of video and picture editing tools as well as the ability to add captions with customizable fonts and colors. Enjoy the videos and music you love, upload original content, and share it all with friends, family, and the world on YouTube. URL: https://somewebsite.com
-
Feel free to Create a New Topic in this topic thread if you do not see a Live Streaming Software you use and wish it to be added to the forum. Please Note: You can use the example below on how to submit with your request... EXAMPLE: Live Streaming Software: VMIX Description: vMix is software that allows you to create professional quality productions on your own computer at a fraction of the cost. vMix gives you the power to add multiple cameras, videos, images, audio, web streams, Powerpoint, titles, virtual sets, chroma key, and much more to your production. You are then able to display, record and live stream your production all at the same time!
-
Feel free to Create a New Topic in this topic thread if you do not see a Live streaming Platform you use and wish it to be added to the forum. Please Note: You can use the example below on how to submit with your request... EXAMPLE: Live Streaming Platform: Youtube Description: Enjoy the videos and music you love, upload original content, and share it all with friends, family, and the world on YouTube.
-
- 1
-

-
Want us to add some tools to our list? Feel free to Create a New Topic in this topic thread if you do not see a live streaming tool you use and wish it to be added to the forum. EXAMPLE: TITLE: Adobe Premier LINK: https://www.adobe.com/products/premiere.html Description of Live Streaming tool: Premiere Pro is the industry-leading video editing software for social sharing, TV, and film. Creative tools, integration with other apps and services, and the power of Adobe Sensei help you craft footage into polished films and videos.
-
- 1
-

-
Welcome to the new M1GC, This site / thread will contain all site news, changes, updates for the M1GC website. As you may have seen we have pruned all users / members from our previous site, but retained some of our posts.. We recommend our previous members to rejoin the webite... All are welcome to join the site if your a gamer or a viewer... We got alot in store for the crew so stay tuned as the site will be updated frequently...
-
[M1GC] WarPath – [NYC] Noob Friendly [ENG] – M1-Gaming Crew Please note: Server name and IP does change frequently.. GAME MODE DETAILS: The area has fallen to the enemy, and it is up to you to take it back. Embark with your teammates on a persistent campaign that will span several weeks of real time to liberate all the major cities of the area. Experience a massive CTI campaign with up to 200 different capture-able settlements across the entire area Cooperative game-play for up to 64 players A commander role to take care of the planning, production, logistic and AI commanding Recruit-able AI troops to fill the gaps Buy troops and vehicles using three different types of resources Build the FOB of your dreams with an in-game "what you see is what you get" system Fight aggressive and cunning hostile forces who react and adapt to your actions Learn that every window is a threat thanks to the custom urban combat AI Accomplish meaningful secondary objectives that will benefit your progression Never lose your progress with the built-in server-side save system The server will remain public, and can be used for our M1GC members crew and the public for practicing and plain ol arma 3 fun. Please note: There may be random players, If you experience any issue, Please be sure to contact us asap so we may initiate any kicks or bans to avoid future discrepancies... Check the [M1GC] Arma 3 Dedicated Server stats & mods we use here. Were proud to announce we now have a Dedicated Arma 3 Server! Thanks to the awesome work by MuRdeRoNYoBloCk, We now have a up and running Dedicated Server in Arma 3 Feel free to join and have fun. The server will remain public, and can be used for our M1GC members crew practicing with public players. Please note: There may be random players, If you experience any issue, Please be sure to contact us asap so we may initiate any kicks or bans to avoid future discrepancies... Check the [M1GC] Arma 3 Dedicated Server stats & mods we use here
-
Unfortunately, The NGINX module nginx-rtmp-module doesn’t support RTMPS “out-of-the-box”. The nginx-rtmp-module also doesn't support pushing to an rtmps:// address... and i don't think the feature will be added in any recent releases as it is simple to achieve this and the module hasn't been updated in years... A easy way to incorporate RTMPS into this module is by using stunnel, a popular “application used to provide a universal TLS/SSL tunneling service”. How to Secure rtmps push / rtmps stream to Facebook I'll assume you have some pre-installed version of Nginx installed with the RTMP-Module & ffmpeg (optional) Using NGINX on Windows For this setup, I’m using nginx 1.17.0.1 Crow (download here) on Windows 10. The subscription version for windows contains the RTMP-Module (Read here to view free / commercial Nginx modules installed) Purchase your subscription here. NOTE: (Purchase at own risk as M1GC are not affiliated with this website) or try to find a nginx for windows version that is available for free. PLEASE NOTE: NGINX AND THE RTMP STREAMING SERVER MODULE MUST BE CONFIGURED FOR WINDOWS STREAMING BEFORE USING STUNNEL Stunnel for Windows (Download) After you installed stunnel, you need to edit stunnel.conf which is located in C:\\Users\YourUsername\AppData\Local\stunnel\config\stunnel.conf Stunnel uses SSL certificates to secure its connections, which you can easily create using the OpenSSL package, Certbot, or by using the Stunnels SSL Cert: On Windows On windows, during stunnels install / start up, you will create a default certificate for your server which can be used to secure your server from man in the middle attacks... Your code will look like so, to use a secure certificate during your live streams. [fb-live] client = yes accept = 127.0.0.1:19350 connect = live-api-s.facebook.com:443 verifyChain = yes CAfile = C:\Program Files (x86)\stunnel\config\ca-certs.pem checkHost = live-api-s.facebook.com OCSPaia = yes This creates a session that allows NGINX to send the stream via RTMP and stunnel will then send the stream to Facebook via RTMPS. ____________ ____________ ____________ ____________ | Streaming | | | | | | Facebook | | Source | ---> | NGINX | ---> | stunnel | ---> | Live | |____________| |____________| |____________| |____________| Now modify nginx.conf and replace the old Facebook push instruction (If you had it there before) with the following line: push rtmp://127.0.0.1:19350/rtmp/<your_facebook_stream_key>; Save those two files and start stunnel via command-line or with the GUI application and then start nginx. Test your live stream with OBS or ffmpeg. That’s all there is to it! On LINUX Install Stunnel4 apt-get install stunnel4 -y Now lets create our default stunnel config This will set stunnel linux userid, processid, and groupid. It will also output any issues to the stunnel.log file, while including a new config directory, for using individual stunnel config files instead of a single config. nano /etc/stunnel/stunnel.conf and copy, paste the code below and save setuid = stunnel4 setgid = stunnel4 pid=/tmp/stunnel.pid output = /var/log/stunnel4/stunnel.log include = /etc/stunnel/conf.d Create LetsEncrypt Signed Certificate Install Certbot Run this command on the command line on the machine to install Certbot. snap install --classic certbot Create a Standalone Certificate Authority Prepare the Certbot command Execute the following instruction on the command line on the machine to ensure that the certbot command can be run. ln -s /snap/bin/certbot /usr/bin/certbot Choose how you'd like to run Certbot (Standalone / Domain or DNS) Creating a Standalone Domain Certificate certbot certonly -d yourdomains.com -d www.yourdomain.com --standalone For DNS / Wildcard Certificate, Click here. DOWNLOAD The Mozilla CA Certificate Store Certificate:: wget https://curl.se/ca/cacert.pem (M1GC's Mozilla CA certificate Store Certificate) (MIRROR) wget https://m1-gamingz.com/stunnel/cacert.pem Make a directory for your certs, just in case you create more configs (recommended) mkdir /etc/stunnel/certs/ COPY the cert to your new Directory cp cacert.pem /etc/stunnel/certs/ca-certs.pem Update the fb.conf (/etc/stunnel/conf.d/fb.conf) to the new certificate location if you choose to save your cert in a new directory. nano /etc/stunnel/conf.d/fb.conf EXAMPLE OF fb.conf with LetsEncrypt Signed Certificate: [fb-live] client = yes accept = 127.0.0.1:19350 connect = live-api-s.facebook.com:443 cert = /etc/letsencrypt/live/YOURDOMAIN/fullchain.pem key = /etc/letsencrypt/live/YOURDOMAIN/privkey.pem verifyChain = yes CAfile = /etc/stunnel/certs/ca-certs.pem checkHost = live-api-s.facebook.com OCSPaia = yes sslVersion = TLSv1.3 options = NO_SSLv2 options = NO_SSLv3 You can use the full chain.pem in your fb.conf which is a combination of your private key (privkey) and your (cert). Basically, the full chain.pem above is a combining of the the two private key, cert, and ca authority into one file name. BELOW ARE MORE EXAMPLES OF USING DIFFERENT CERTIFICATES WITH STUNNEL. Create a Self Signed Certificate for Stunnel (OpenSSL) Stunnel uses SSL certificate to secure its connections, which you can easily create using the OpenSSL package: Using stunnel in client mode (i.e., stunnel is not acting as an SSL server) means you (the client) probably don't need to present a valid certificate (to the server). SINCE WERE CONNECTING REMOTELY IN CLIENT MODE, WE CAN USE THE MOZILLAS CA AUTHORITY STORE CERT AS A CA AUTHORITY. The cacerts file is a collection of trusted certificate authority (CA) certificates. Make a directory for your certs, just in case you create more configs (recommended) mkdir /etc/stunnel/certs/ Now lets create a self signed certificate and a private key openssl genrsa -out key.pem 2048 openssl req -new -x509 -key key.pem -out cert.pem -days 1095 at key.pem cert.pem >> /etc/stunnel/certs/combined-cert.pem The commands above is for creating a Private Key, Creating a x509 Certificate using that Private Key with 1095 days before expiration, and combining the two of them into one files named “cert.pem” to use with Stunnel. Note: When creating the certificate, you will be asked for some information such as organization name, country and state, which you can enter whatever you like but when asked for “Common Name” you must enter the correct host name, dns name, or IP address of your server Copy the certs to your new Directory cp key.pem combined-cert.pem /etc/stunnel/certs/ DOWNLOAD The Mozilla CA certificate store certificate:: wget https://curl.se/ca/cacert.pem (M1GC Mozilla CA certificate store certificate MIRROR) wget https://m1-gamingz.com/stunnel/cacert.pem COPY the cert to your new Directory cp cacerts.pem /etc/stunnel/certs/ca-certs.pem Make sure to update the fb.conf (/etc/stunnel/conf.d/fb.conf) to the new certificate location if you choose to save your cert in a new directory. nano /etc/stunnel/conf.d/fb.conf EXAMPLE OF fb.conf with Self Signed Certificate: [fb-live] client = yes accept = 127.0.0.1:19350 connect = live-api-s.facebook.com:443 cert = /etc/stunnel/certs/combined-cert.pem key = /etc/stunnel/certs/key.pem verifyChain = yes CAfile = /etc/stunnel/certs/ca-certs.pem checkHost = live-api-s.facebook.com OCSPaia = yes sslVersion = TLSv1.3 options = NO_SSLv2 options = NO_SSLv3 USING MOZILLAS CA AUTHORITY CERTIFICATE ONLY IN STUNNEL (STUNNEL CLIENT MODE ONLY) CERTIFICATE AUTHORITY FOR STUNNEL (Mozilla CA Authority Certificate) Stunnel uses SSL certificate to secure its connections, which you can easily create using the certificate provided by Mozilla and CACERT: Using stunnel in client mode (i.e., stunnel is not acting as an SSL server) means you (the client) probably don't need to present a valid certificate (to the server). SINCE WERE CONNECTING REMOTELY IN CLIENT MODE, WE CAN USE THE MOZILLAS CA AUTHORITY STORE CERT AS A CA AUTHORITY. The cacerts file is a collection of trusted certificate authority (CA) certificates. You can also make a directory for your certs, just in case you create more configs (recommended) mkdir /etc/stunnel/certs/ DOWNLOAD The Mozilla CA certificate store certificate: wget https://curl.se/ca/cacert.pem (M1GC Mozilla CA certificate store certificate MIRROR) wget https://m1-gamingz.com/stunnel/cacert.pem COPY the cert to your new Directory cp cacerts.pem /etc/stunnel/certs/ca-certs.pem Make sure to update the fb.conf (/etc/stunnel/conf.d/fb.conf) to the new certificate location if you choose to save your cert in a new directory. nano /etc/stunnel/conf.d/fb.conf EXAMPLE OF fb.conf with Mozilla's CA Certificate: [fb-live] client = yes accept = 127.0.0.1:19350 connect = live-api-s.facebook.com:443 verifyChain = yes CAfile = /etc/stunnel/certs/ca-certs.pem checkHost = live-api-s.facebook.com OCSPaia = yes sslVersion = TLSv1.3 options = NO_SSLv2 options = NO_SSLv3 THATS IT. NOW LETS RUN / START STUNNEL... Start Stunnel systemctl restart stunnel4 && systemctl status stunnel4 or Service stunnel4 restart && service stunnel4 status OUTPUT ● stunnel4.service - LSB: Start or stop stunnel 4.x (TLS tunnel for network daemons) Loaded: loaded (/etc/init.d/stunnel4; generated) Active: active (running) since Thu 2021-07-01 13:54:20 UTC; 29ms ago Docs: man:systemd-sysv-generator(8) Process: 1270 ExecStart=/etc/init.d/stunnel4 start (code=exited, status=0/SUCCESS) Tasks: 2 (limit: 4615) Memory: 7.0M CGroup: /system.slice/stunnel4.service └─1299 /usr/bin/stunnel4 /etc/stunnel/stunnel.conf Jul 01 13:54:20 stunnel stunnel[1295]: LOG5[ui]: Reading configuration from file /etc/stunnel/stunnel.conf Jul 01 13:54:20 stunnel stunnel[1295]: LOG5[ui]: UTF-8 byte order mark not detected Jul 01 13:54:20 stunnel stunnel[1295]: LOG5[ui]: Reading configuration from file /etc/stunnel/conf.d/fb.conf Jul 01 13:54:20 stunnel stunnel[1295]: LOG5[ui]: UTF-8 byte order mark not detected Jul 01 13:54:20 stunnel stunnel[1295]: LOG5[ui]: FIPS mode disabled Jul 01 13:54:20 stunnel stunnel[1295]: LOG5[ui]: Configuration successful Jul 01 13:54:20 stunnel stunnel4[1270]: Starting TLS tunnels: /etc/stunnel/stunnel.conf: started Jul 01 13:54:20 stunnel systemd[1]: Started LSB: Start or stop stunnel 4.x (TLS tunnel for network daemons). STUNNEL IS NOW UP AND RUNNING Assuming FFMPEG is installed, We can run a ffmpeg command to test pushing a stream, target to local stunnel port :19350 ffmpeg -re -i rtmp://127.0.0.1/live/yourstreamkeyinobs -c:v libx264 -c:a aac -f flv rtmp://127.0.0.1:19350/rtmp/<facebook-live-stream-key> If your stream goes live on Facebook, The Stunnel is Now ready to work! Now we just need to Replace the URL to the local stunnel port within the NGINX RTMP config. Change this line in your nginx config (Streaming to Facebook Un-Securely) push rtmp://live-api-s.facebook.com:80/rtmp/<facebook-live-stream-key>; To (Streaming to Facebook Securely) push rtmp://127.0.0.1:19350/rtmp/<facebook-live-stream-key>; All done! Again, From a high level Your Streaming Source (OBS/XSplit/Wirecast/etc) NGINX Stunnel Facebook Your stream should now operate like so: ____________ ____________ ____________ ____________ | Streaming | | | | | | Facebook | | Source | ---> | NGINX | ---> | stunnel | ---> | Live | |____________| |____________| |____________| |____________| That's all there is to it. Hope this helps out on pushing your streams securely to rtmps servers.
-
- 2
-

-
What is Docker? Docker is a tool designed to make it easier to create, deploy, and run applications by using containers. Containers allow a developer to package up an application with all of the parts it needs, such as libraries and other dependencies, and ship it all out as one package with the full os included so everything configured works right out the box. Getting Started with installing Docker Windows / Mac OSX / Linux WINDOWS AND MAC USERS INSTALL DOCKER (STAND ALONE) : Download & install on Windows or Mac NOTE: With Docker Desktop you get Docker Engine, Docker CLI with Docker Compose plugin as well as other components and tools. You can also install Docker to Virtualization Software. Install Docker onto a VM (Virtual Machine) in VMWare Workstation (Paid) or VirtualBox (Free) or Docker (Free) You may also use Cloud Providers Machines such as Digital Ocean, AWS, Google Cloud, Microsoft Azure or M1-Serverz to create a machine in the cloud but may be costly.. We recommend having enough CPU, Memory, & Bandwidth Resources to achieve stable streaming on the same PC. If you do not know how to install Ubuntu Server to VMWare Workstation, VirtualBox, & Docker, Check the links below: How to install Ubuntu Server to VMWare Workstation Purchase: VMWare Workstation How to install Ubuntu Server to VirtualBox Download: Virtualbox How to Install Ubuntu Server to Docker Desktop Download Docker Desktop NOTE: DOCKER DESKTOP UPDATED THERE SUBSCRIPTION LICENSE THIS MAY AFFECT WINDOWS USERS USING DOCKER DESKTOP. CLICK HERE FOR MORE INFORMATION Download Ubuntu Server OS Latest GETTING STARTED Once your Virtualization Software is installed, & you have created a VM (Virtual Machine) with the latest Ubuntu Server operating system installed on your VM Login to your VM INSTALL DOCKER curl -fsSL https://get.docker.com/ | sh NOTE: for windows Hyper-V will be enabled via the software install. Virtualization must be enabled via BIOS for Docker Desktop to work. Check if docker is running & its version ON WINDOWS Open Windows Powershell LINUX or MAC OSX - Use your preferred Command Line / Terminal tool on Linux or Mac OSX. Check if dockers daemon is running docker Check your docker version docker -v What is Docker Compose? Compose is a tool for defining and running multi-container Docker applications. With Compose, you use a YAML file to configure your application’s services. Then, with a single command, you create and start all the services from your configuration. MANUALLY INSTALLING DOCKER COMPOSE install Docker Compose sudo curl -L "https://github.com/docker/compose/releases/download/v2.24.7/docker-compose-$(uname -s)-$(uname -m)" -o /usr/local/bin/docker-compose Apply executable permissions to the binary: sudo chmod +x /usr/local/bin/docker-compose Check your docker compose version docker-compose -v Upgrade Docker Compose to the Latest Version via Shell Script. wget https://raw.githubusercontent.com/MurderousOne/nginx-rtmp-ffmpeg-docker/main/upgrade-docker-compose Apply executable permissions to the shell script chmod +x upgrade-docker-compose Now lets run our script to Install Docker Compose / Upgrade Docker Compose ./upgrade-docker-compose Check your docker compose version docker-compose -v To install Docker Compose on other non linux based operating systems such as Mac, Windows, Windows Server, Click Here. NOTE: Docker Desktop for windows & mac may have Docker Compose Pre-installed. Downloading and Creating your container Using docker-compose (Ubuntu Server Image) Create a new Directory mkdir nginx-rtmp Create a Docker Compose file inside your new directory: (example: docker-compose.yml) Change Directory cd nginx-rtmp Create the docker compose file: nano docker-compose.yml Add the code below and save version: "3.9" services: nginx-rtmp-streaming-server: image: murderousone/nginx-ffmpeg-rtmp:ubuntu-latest volumes: - nginxconfig:/usr/local/nginx/conf/ container_name: m1gc-nginx-rtmp-server restart: unless-stopped stdin_open: true tty: true ports: - "80:80" - "443:443" - "1935:1935" volumes: nginxconfig: NOTE: For Raspberry Pi4 Users, use Rasbpberrypi4 image. (Example: image: murderousone/nginx-ffmpeg-rtmp:ubuntu-arm64) Check out our NGINX/RTMP Streaming Server Docker Image from Docker Hub for more information. Docker image is a Ubuntu Server x64 and Ubuntu Server ARM x64 base os which contains all the configuration M1 created for NGINX/FFMPEG streaming using a x2 PC Stream / Gaming setup The docker image is also unlocked and contains pre-made bash scripts to run your streaming server even easier than our manual setup. It will be pulled into your system with nginx/ffmpeg/rtmp streaming server preconfigured. Docker also allows better performance and less resources to your computer / server. # To Create, and Start the container docker-compose up -d Above docker command will pull the image, create, run and start the Docker Container / Streaming Server already configured with enabled ports opened. Here's a Tutorial Video of the Install Process START THE RTMP SERVER ./start-rtmp EXIT THE CONTAINER WHILE LEAVING IT RUNNING HOLD: CRTL + p + q Your docker streaming server is now started and running in the background... You can now connect to it, using your preferred streaming software. (OBS Studio, XSplit Broadcaster, vMix, Streamlabs OBS, etc) To update the container with Docker Compose: # Pull the latest image / update docker-compose pull # To Create and Start the container docker-compose up -d Stop containers and removes containers, networks, and images created by Docker-Compose up docker-compose down NOTE: IF YOU UPDATE THE DOCKER IMAGE TO A NEW VERSION, DOCKER COMPOSE WILL RECREATE THE DOCKER CONTAINER WITH THE NEW IMAGE UPDATES. WHEN DOCKER COMPOSE RECREATES THE DOCKER CONTAINER, ANY CONFIGS CHANGES MADE TO THE CONTAINER WILL NOT BE DELETED DUE TO THE VOLUME. VOLUMES WILL BACKUP YOUR CONTAINER NGINX COFNIG CHANGES AND WILL REQUIRE A VOLUME DELETE TO GO BACK TO DEFAULTS. List and Delete Volumes List Docker Volumes docker volume ls Delete Docker Volumes docker volume rm volume_name volume_name YOU CAN EXECUTE SCRIPTS FROM OUTSIDE THE CONTAINER WITHOUT ATTACHING USING DOCKER EXEC docker exec nginx-rtmp-server ./restart-rtmp OR Attach to the Running RTMP Docker Container NOTE: THE IMAGE COMPLETELY TRANSPARENT / INSPECTABLE / ATTACHABLE / SIMPLE U CAN EDIT, UPDATE, INSPECT THE FULL OS / MAKE ANY CHANGES OF YOUR OWN. docker attach nginx-rtmp-server # To Destroy the Container docker-compose down Setting up main gaming computer to stream to NGINX / RTMP Main gaming computer Any ol Gaming PC with OBS Studio & NVENC encoding. In OBS, i use NVENC encoding and I use my monitor’s native resolution (1080p). Using OBS Studio, in your broadcast settings you need to use the “Custom” streaming service. The Streaming URL will be something like rtmp://192.168.1.100/live (Use your own server’s IP). Your Stream Key needs to be the same you used in your nginx configuration. (Example: KEYNAME-YOU-SET) In the Encoding, use NVIDIA NVENC (Since it doesn’t use a lot of CPU). Bit-rates Click here for Live encoder best settings for bit-rates, and resolutions You may need to reduce your bit-rate depending on services bandwidth limits. You may need to adjust your max bit rate according to your needs and capabilities AUDIO As for Audio encoding, I use the AAC codec, 160 bit rate and a Format of 44 or 48 Khz. * RTMP Video on demand FLV/MP4, playing from local filesystem or HTTP * Stream relay support for distributed streaming: push & pull models * Recording streams in multiple FLVs * H264/AAC support * Online transcoding with FFmpeg * HTTP callbacks (publish/play/record/update etc) * Running external programs on certain events (exec) * HTTP control module for recording audio/video and dropping clients * Advanced buffering techniques to keep memory allocations at a minimum level for faster streaming and low memory footprint * Proved to work with Wirecast, FMS, Wowza, JWPlayer, FlowPlayer, StrobeMediaPlayback, ffmpeg, avconv, rtmpdump, flvstreamer and many more * Statistics in XML/XSL in machine- & human- readable form ENJOY!
-
- 2
-

-
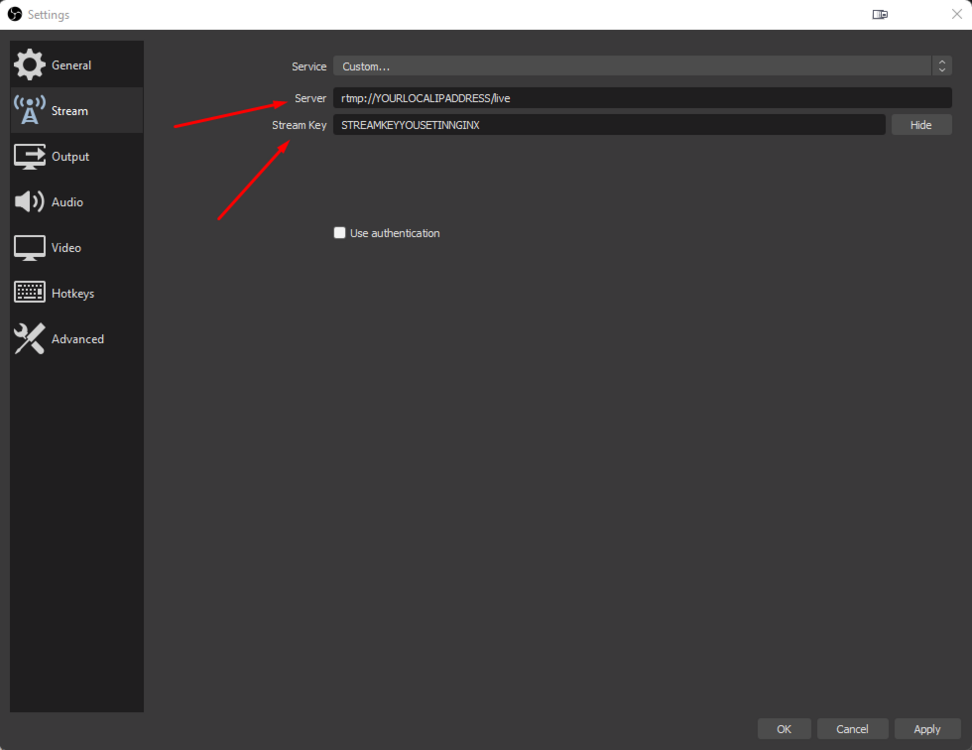
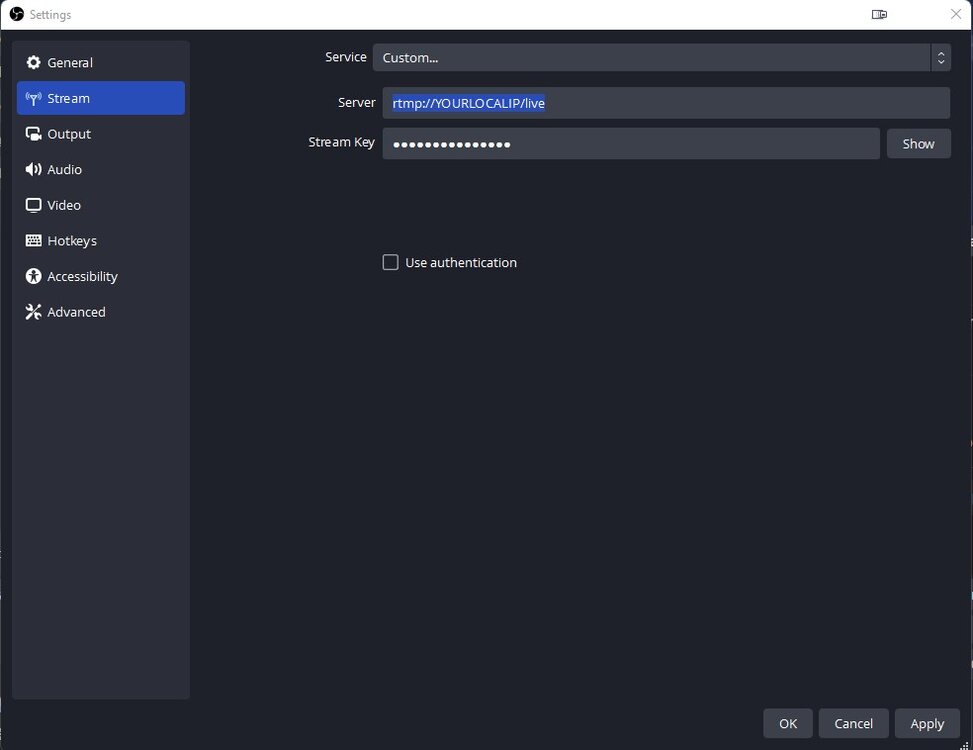
Creating Your own Private NGINX/RTMP/FFMPEG server for streaming NGINX/FFMPEG-based Media Streaming Server Ubuntu Latest LTS x64 Based OS with NGINX LATEST w RTMP SUPPORT / FFMPEG LATEST RTMP/HLS/MPEG-DASH live streaming RTMP Video on demand FLV/MP4, playing from local filesystem or HTTP Stream relay support for distributed streaming: push & pull models Recording streams in multiple FLVs H264/AAC support Online transcoding with FFmpeg HTTP callbacks (publish/play/record/update etc) Running external programs on certain events (exec) HTTP control module for recording audio/video and dropping clients Advanced buffering techniques to keep memory allocations at a minimum level for faster streaming and low memory footprint Proved to work with Wirecast, FMS, Wowza, JWPlayer, FlowPlayer, StrobeMediaPlayback, ffmpeg, avconv, rtmpdump, flvstreamer and many more Statistics in XML/XSL in machine- & human- readable form REQUIREMENTS X2 PC's - One for Broadcasting / One for Streaming for Best Results. If you only have X1 PC - System must have enough resources to support Broadcasting / Streaming, including running virtualization technology and virtual machines. Ubuntu OS (May work on other Operating Systems with command modifications) Multi-core CPU for FFMPEG / 2GB RAM Minimum / 4GB+ or more Recommended Disk space as required for any media files or recordings... PLEASE NOTE: You can also try our Docker Version which may save you some resources and time. The Tutorial below will describe for both x1 or x2 pc / server setups.. Setting up the RTMP Streaming Server on 2nd Streaming PC or VM PLEASE NOTE: IF YOU DO NOT HAVE A 2ND PC FOR STREAMING You can run a 2nd Operating System / system on your main computer you use by utilizing virtualization: VMWare Workstation (Paid) or VirtualBox (Free) or Docker (Free) You may also use Cloud Providers such as Digital Ocean, AWS, Google Cloud, Microsoft Azure to create a machine but may be costly or you can use M1-Serverz VPS which is a bit more affordable. We recommend having enough CPU, Memory, & Bandwidth Resources to achieve stable streaming on the same PC. If you do not know how to install Ubuntu Server to VMWare Workstation, VirtualBox, & Docker, Check the links below: How to install Ubuntu Server to VMWare Workstation Purchase: VMWare Workstation How to install Ubuntu Server to VirtualBox Download: Virtualbox How to Install Ubuntu Server to Docker Desktop Download Docker Desktop NOTE: DOCKER DESKTOP UPDATED THERE SUBSCRIPTION LICENSE THIS MAY AFFECT WINDOWS USERS USING DOCKER DESKTOP. CLICK HERE FOR MORE INFORMATION Download Ubuntu Server OS Latest Once your Virtualization Software is installed, & you have created a VM (Virtual Machine) with the latest Ubuntu Server operating system on your VM, Login to your Ubuntu Server System. Install SSH on your Ubuntu Server apt install ssh openssh-server -y (You can now use Putty to SSH into your VM - Example: yourubuntuusername@yourlocalorexternalip ) User is logged in as root. (Not Recommended) During this example, i am logged in a root. To login as root user: sudo su We recommend using a standard user without administrator permissions for best security. If logged in as root - You do not need to add sudo to every command. If logged in as a user - add sudo to all commands below (Example: sudo apt install ffmpeg ) Installing FFMPEG on Ubuntu Server (Optional) Notice: FFMPEG is back in Ubuntu. Ubuntu Server now comes with FFMPEG by default in its repositories. Therefore, to install it, You only need to run: apt -y install ffmpeg Next, verify the installation with the following terminal command: ffmpeg -version If you wish to compile FFMPEG from source to use the latest version, follow this FFMPEG Compilation Guide. Compiling FFMPEG from Source (Ubuntu 22.04.4 LTS ) These are packages required for compiling, but you can remove them when you are done if you prefer: apt update -qq && apt -y install \ autoconf \ automake \ build-essential \ cmake \ git-core \ libass-dev \ libfreetype6-dev \ libgnutls28-dev \ libmp3lame-dev \ libsdl2-dev \ libtool \ libva-dev \ libvdpau-dev \ libvorbis-dev \ libxcb1-dev \ libxcb-shm0-dev \ libxcb-xfixes0-dev \ meson \ ninja-build \ pkg-config \ texinfo \ wget \ yasm \ zlib1g-dev \ nasm \ libx264-dev \ libx265-dev \ libnuma-dev \ libvpx-dev \ libfdk-aac-dev \ libopus-dev \ libunistring-dev \ libaom-dev \ libdav1d-dev Create a directory for Compilation files / binaries of FFMPEG mkdir -p ~/ffmpeg_sources ~/bin Begin Compiling and Installing FFMPEG cd ~/ffmpeg_sources && \ wget -O ffmpeg-7.1.1.tar.bz2 https://ffmpeg.org/releases/ffmpeg-7.1.1.tar.bz2 && \ tar xjvf ffmpeg-7.1.1.tar.bz2 && \ cd ffmpeg-7.1.1 && \ PATH="$HOME/bin:$PATH" PKG_CONFIG_PATH="$HOME/ffmpeg_build/lib/pkgconfig" ./configure \ --prefix="$HOME/ffmpeg_build" \ --pkg-config-flags="--static" \ --extra-cflags="-I$HOME/ffmpeg_build/include" \ --extra-ldflags="-L$HOME/ffmpeg_build/lib" \ --extra-libs="-lpthread -lm" \ --ld="g++" \ --bindir="$HOME/bin" \ --enable-gpl \ --enable-gnutls \ --enable-libfdk-aac \ --enable-libfreetype \ --enable-libmp3lame \ --enable-libopus \ --enable-libvorbis \ --enable-libvpx \ --enable-libx264 \ --enable-libx265 \ --extra-libs="-lpthread" \ --enable-nonfree && \ PATH="$HOME/bin:$PATH" make && \ make -j4 install && \ hash -r Be patient and grab a coffee as this process may take a few mins to complete. Next, Change to your ffmpeg bin directory cd ~/bin Then, Copy FFMPEG to its default locations on Linux cp ffmpeg /usr/bin/ffmpeg cp ffmpeg /usr/share/ffmpeg cp ffmpeg /usr/local/bin/ffmpeg Optional: Copy FFPLAY to its default locations on Linux FFplay is a very simple and portable media player using the FFmpeg libraries and the SDL library. It is mostly used as a testbed for the various FFmpeg APIs. cp ffplay /usr/bin/ffplay cp ffplay /usr/share/ffplay cp ffplay /usr/local/bin/ffplay Optional: Copy FFPROBE to it's default location on Linux. ffprobe gathers information from multimedia streams and prints it in human- and machine-readable fashion. For example it can be used to check the format of the container used by a multimedia stream and the format and type of each media stream contained in it. cp ffprobe /usr/bin/ffprobe cp ffprobe /usr/share/ffprobe cp ffprobe /usr/local/bin/ffprobe Next, verify the installation with the following terminal command: ffmpeg -version FFMPEG IS NOW COMPILED AND READY FOR USE Lets cleanup and remove its install directories & binaries Change directory to ~ cd ~ Next, lets remove the FFMPEG Compilation Directories. rm -r bin ffmpeg_build ffmpeg_sources Then exit out of the home directory and to the root directory cd .. or cd / Compiling and installing NGINX with the RTMP module You need to install the prerequisite libraries Install the Prerequisite Libraries apt install unzip zlib1g-dev wget vim-nox nano build-essential libpcre3 libpcre3-dev libssl-dev -y Now you need to download the latest NGINX and the RTMP Module and unpack them Check this link for NGINX latest mainline version. wget https://nginx.org/download/nginx-1.28.0.tar.gz wget https://github.com/MurderousOne/nginx-rtmp-module/archive/master.zip tar -xvf nginx-1.28.0.tar.gz unzip master.zip cd nginx-1.28.0 Build NGINX with the NGINX-RTMP Module Configure, Make, Make Install ./configure --with-http_ssl_module --add-module=../nginx-rtmp-module-master --with-debug --with-cc-opt="-Wimplicit-fallthrough=0" && make && make install Configuring NGINX Once Nginx is compiled, The default location for the configuration file is: /usr/local/nginx/conf/nginx.conf Edit the NGINX Configuration File vi /usr/local/nginx/conf/nginx.conf or nano /usr/local/nginx/conf/nginx.conf and at the end of the file, add the following: # ____ _____ __ __ ____ __ __ _____ ____ ___ _ ____ _____ ____ _____ _ __ __ ___ _ _ ____ ____ _____ ______ _______ ____ # | _ \_ _| \/ | _ \ | \/ | ____| _ \_ _| / \ / ___|_ _| _ \| ____| / \ | \/ |_ _| \ | |/ ___| / ___|| ____| _ \ \ / / ____| _ \ # | |_) || | | |\/| | |_) | | |\/| | _| | | | | | / _ \ \___ \ | | | |_) | _| / _ \ | |\/| || || \| | | _ \___ \| _| | |_) \ \ / /| _| | |_) | # | _ < | | | | | | __/ | | | | |___| |_| | | / ___ \ ___) || | | _ <| |___ / ___ \| | | || || |\ | |_| | ___) | |___| _ < \ V / | |___| _ < # |_| \_\|_| |_| |_|_| |_| |_|_____|____/___/_/ \_\ |____/ |_| |_| \_\_____/_/ \_\_| |_|___|_| \_|\____| |____/|_____|_| \_\ \_/ |_____|_| \_\ # rtmp { server { listen 1935; ping 30s; notify_method get; application live { live on; #push to restream.io push rtmp://live.restream.io/live/streamkey; } } } That's it. Above the live application will publish a stream direct from your streaming software to any platform you listed as push. in this case, it is sending a stream from my PC with OBS Studio, to the 2nc PC Streaming Server, which then sends the stream out to the platform listed. Want to send more? Just add another push and send your stream to that platform as well. # ____ _____ __ __ ____ __ __ _____ ____ ___ _ ____ _____ ____ _____ _ __ __ ___ _ _ ____ ____ _____ ______ _______ ____ # | _ \_ _| \/ | _ \ | \/ | ____| _ \_ _| / \ / ___|_ _| _ \| ____| / \ | \/ |_ _| \ | |/ ___| / ___|| ____| _ \ \ / / ____| _ \ # | |_) || | | |\/| | |_) | | |\/| | _| | | | | | / _ \ \___ \ | | | |_) | _| / _ \ | |\/| || || \| | | _ \___ \| _| | |_) \ \ / /| _| | |_) | # | _ < | | | | | | __/ | | | | |___| |_| | | / ___ \ ___) || | | _ <| |___ / ___ \| | | || || |\ | |_| | ___) | |___| _ < \ V / | |___| _ < # |_| \_\|_| |_| |_|_| |_| |_|_____|____/___/_/ \_\ |____/ |_| |_| \_\_____/_/ \_\_| |_|___|_| \_|\____| |____/|_____|_| \_\ \_/ |_____|_| \_\ # rtmp { server { listen 1935; ping 30s; notify_method get; application live { live on; #push to restream.io push rtmp://live.restream.io/live/streamkey; #push to youtube push rtmp://a.rtmp.youtube.com/live2/streamkey; } } } PLEASE NOTE: You will require the same amount of bandwidth for both push streams. If you use 6mbps to stream a 1080p60fps stream to one platform, it will require 12mbps of Upload Bandwidth for streaming to x2 platforms. Using restream.io will save you on streaming to multi-platforms simultaneously. You can stream to 30+ platforms and only use 6mbps.. Adding additional push to platforms, will require additional upload bandwidth... Be sure to speed test your upload speeds to test your networks full capabilities. Running the server You can start the nginx server manually by running the following command: /usr/local/nginx/sbin/nginx But we recommend you add it in your services for convenience. wget https://raw.githubusercontent.com/MurderousOne/nginx-rtmp-ffmpeg-docker/main/nginx -O /etc/init.d/nginx chmod +x /etc/init.d/nginx update-rc.d -f nginx defaults Start / Stop / Restart the NGINX server service nginx start service nginx stop service nginx restart Back out of NGINX FOLDER cd .. Download the above commands as shell scripts for easy executing. wget https://raw.githubusercontent.com/MurderousOne/nginx-rtmp-ffmpeg-docker/main/upgrade wget https://raw.githubusercontent.com/MurderousOne/nginx-rtmp-ffmpeg-docker/main/edit-rtmp wget https://raw.githubusercontent.com/MurderousOne/nginx-rtmp-ffmpeg-docker/main/start-rtmp wget https://raw.githubusercontent.com/MurderousOne/nginx-rtmp-ffmpeg-docker/main/stop-rtmp wget https://raw.githubusercontent.com/MurderousOne/nginx-rtmp-ffmpeg-docker/main/restart-rtmp Make the scripts executable chmod +x upgrade edit-rtmp restart-rtmp start-rtmp stop-rtmp Cleaning up left over files and folders These installation files are no longer needed and will reduce space on your server rm -r master.zip nginx-1.28.0 nginx-rtmp-module-master nginx-1.28.0.tar.gz SET ULIMIT (For Docker Containers Only) ulimit -n 1024 This allows for nginx exec commands to run without issues if installing on docker containerized environments. Execute the shell commands Start / Stop / Restart the NGINX server Start the NGINX Server ./start-rtmp Stop the server ./stop-rtmp Restart the server ./restart-rtmp Edit the rtmp server config ./edit-rtmp Upgrade the software packages ./upgrade Setting up the main broadcasting / streaming computer Main broadcasting computer or Any ol PC Capable of running OBS Studio with x264 or NVENC encoding. In OBS, i use NVENC encoding and I use my monitor’s native resolution (1080p). Using OBS Studio, in your broadcast settings you need to use the “Custom” streaming service. NOTE: (You can use your servers local IP or External IP Address) Your Stream Key needs to be the same you used in your nginx configuration. (Stream-Key is Case-Sensitive) In the Encoding, use Nvidia NVENC (Since it doesn’t use a lot of CPU). Bitrates Click here for Live encoder settings, bitrates, and resolutions You may need to reduce your bitrate depending on services bandwidth limits. You may need to adjust your max bitrate according to your needs and capabilities Audio As for Audio encoding, I use the AAC codec, 96k bit rate and a Format of 44 or 48Khz. That's it You can now stream direct with your own lightweight private rtmp server, just like a restream.io, using your own bandwidth, but without the platform limit's.
-
- 3
-

-

-
The world of live streaming has seen an ongoing debate about latency reduction. Upon the arrival of the various low-latency streaming solutions, we want to take some time (ironically) to focus at latency a bit closer. While the discussion has revolved primarily around ultra-low latency solutions employing mainly WebRTC and WebSocket technologies, the “traditional” HTTP-based streaming protocols are still used predominantly for live streaming use cases without any interactive (chat, betting etc.) or real-time elements (video calls). This article discusses what latency is, where and why it is introduced and, most importantly how M1GC is able to help cut down the latency of HLS and MPEG-DASH streams under 10 seconds. From the mere CDN perspective, we used to think of latency as the time it takes for a packet to travel from the origin server to its final destination, the so-called round-trip time. Let's call this phenomenon the network latency. Measured, ideally, in milliseconds, the network latency depends on various factors such as the speed of light, physical distance, transmission rates, network structures and peering policies of autonomous systems involved, last but not least, the network edge infrastructures including our home and mobile internet connections. Glass-to-glass latency Despite its complexity, network latency is just one of the many aspects of entire live streaming latency or, as it is often called, glass-to-glass latency. The latter term refers to the time beginning from the moment an image is captured through the glass lens of a camera until it’s played back on the glass screen of your device. To understand where and why the latency is introduced, let's follow the video signal a bit closer. The glass-to-glass latency countdown begins the very moment when the camera captures an image of our analog world and turns it into a continuous flow of digital data. At the initial stage, the data transfers require large bandwidth capacities (can be Gbit/s and larger). Therefore, the next natural step is to compress the signal using codecs and scale the video bitrates down to values suitable for internet transfer. This process is also known as encoding. Now, when the stream can be transferred over IP, we need to think how to deliver it to viewers effectively. Back in the day, the flash-based RTMP protocol was used to serve this purpose. With Flash being no longer supported by browsers and mobile, however, the HTTP-based workflow was introduced and RTMP is used primarily only as a transport protocol between the encoder and the next unit of the live streaming process - the streaming server. For HTTP-based protocols, the media server breaks the content into small file segments (also called chunks). Each of these segments contains a short interval of the content, normally ranging between 2 to 10 seconds. These chunks are packed within a manifest file which contains the metadata mapping the particular time interval to a specific file segment. At the same time, the server creates copies of the stream in different bitrates and resolution (transcoding) to adapt the stream quality based on users' device and network performance. From there on, the segmented stream travels to global CDN edges where it gets cached and served to users through a player. Each of these units adds certain latency and widens the time gap between the capture and the playback. More specifically, it's a combination of the network latency (encoder > streaming server and the CDN > player), transcoding delay (~5s) and the buffer that both the streaming server and the player create to be able to distribute and play back the stream seamlessly. The latter depends mainly on the chunk duration and may take as much as 10 seconds per each unit. Altogether, the standard HTTP-based protocols offer glass-to glass latency of 25-40 seconds. Low latency. High quality. One might ask why HLS and MPEG-DASH have managed to stick around at times where sub-second latency solutions are being introduced. The answer lies in their easy scalability, wide support across platforms and devices and playback availability without the need of using proprietary applications (player etc.). Simply put, the efforts to bring a smooth and lag-free video watching experience to viewers has taken its toll on the overall latency. We’ve gone through the entire process and we have created a live streaming solution that offers the glass-to-glass latency of HLS and MPEG streams to be lower than 10 seconds while maintaining the uncompromising quality of video delivery.
-
- 1
-

-
What is Real-Time Messaging Protocol and how does it work? The Real-Time Messaging Protocol or RTMP was originally developed by Macromedia and later acquired by Adobe as a low latency TCP based protocol which is able to effectively deliver audio, video and data. Due to the decline of Flash in recent years, RTMP use has also decreased in popularity as newer protocols such as HLS or DASH have become more widely used (along with RTSP) for low latency streaming. The main difference between the RTMP and the HLS protocols is that during the streaming process an active connection is opened when a TCP connection is established. The RTMP connection begins when a handshake occurs, it consists of three packets which are exchanged by the server and the client. This is slightly different when compared to the playback of HTTP streams which function based on a buffer of cached chunks downloaded from a streaming server. With the rise of client-side encoding software such as Open Broadcaster Software, RTMP has played a transit stream role instead of the primary stream playback role. RTMP is then transcoded into a format such as HLS which is optimized for delivery and end-user playback, since it is based on a manifest that contains video tracks consisting of individual segments, which are also able to be easily cached by a CDN. It is the ideal choice for delivering video to multiple video devices, using various internet speeds. RTMP transcoding and ABR compatibility At M1GC, we accept a range of ingest signals including RTMP which we are able to then transcode into a format optimized for CDN Delivery. Converting your RTMP stream into HTTP protocols creates additional support for adaptive bitrate streaming (ABR) and playback compatibility on a wide range of desktop and mobile devices, including iOS and Android. We can accept an RTMP Push stream from your encoding software or we are also able to pull an existing RTMP Stream. It is also possible to simultaneously restream your RTMP stream onto third party streaming sites such as Youtube or Facebook.
-
REQUIREMENTS for LINUX GLIBC 2.17 or higher Install GLIBC UBUNTU sudo apt-get install libglib2.0-dev First of all this guide assumes you've got a Linux Distribution installed with 64 bit architecture. Most hosting companies will run 64bit so not to worry. Other than that, this guide needs no linux experience whatsoever and will be in completely "for dummies" mode. PROTIP: The linux terminal autocompletes with TAB. So if you have a file or folder called "testfolder" you can write "test" and press tab and it will autofill to testfolder! A suggested software to use to connect to your linux server terminal is PUTTY. https://www.chiark.greenend.org.uk/~sgtatham/putty/ INSTALLING SERVER: Log in as root and install the software screen and a library needed for SteamCMD Debian/Ubuntu: apt-get install screen apt-get install lib32gcc1 CentOS: yum -y install screen yum -y install glibc libstdc++ yum -y install glibc.i686 libstdc++.i686 Create a user you want to use for the squadservers. adduser username Enter a password for the user of your own choosing. You may have to change the password with "sudo passwdusername" When prompted for full name, room number, work phone, home phone, and other just press enter. When asked if information is correct write Y and press enter Log on to the new user account: ssh username@localhost and then the password you selected. Make a directory named SquadServer mkdir SquadServer Enter the folder cd SquadServer Make a folder for the first server instance mkdir server1 Download SteamCMD wget https://steamcdn-a.akamaihd.net/client/installer/steamcmd_linux.tar.gz NOTE: Some have complained about getting an untrusted/license error of some sort. If that is the case, try this: wget http://media.steampowered.com/installer/steamcmd_linux.tar.gz Unpack steamCMD tar zxvf steamcmd_linux.tar.gz Create a script for installing (And later updating) the first serverinstance $nano updateserver1.sh - This opens a text editor. Copy paste the following into the file: "./steamcmd.sh +login anonymous +force_install_dir server1 +app_update 403240 validate" Close the file and save by pressing ctrl+o and hitting enter. Exit by pressing ctrl+x Make files in the folder executeable chmod +x * Install the server instance (this same command is used later to update the server when a new version is released.) ./updateserver1.sh When it's finished it will say "Success! App '403240' fully installed." Quit SteamCMD by writing exit and hitting Enter. Create a script for starting the server instance nano startserver1.sh Copy paste the following into the file: cd server1; ./SquadServer.sh Port=7787 QueryPort=27165 FIXEDMAXPLAYERS=80 RANDOM=NONE Save and close the file by pressing ctrl+o > Enter > Ctrl+X Make the script and the server folder executeable chmod +x startserver1.sh chmod +x server1 Open a screen window to run the server in then enter that screen screen -dmS server1 screen -r server1 EDITING CONFIG FILES: Log on as your the user account running the server and go into the Serverconfig folder located in SquadServer/server1/Squad/ServerConfig in our example. cd SquadServer cd server1 cd Squad cd ServerConfig Open the file you wish to edit with NANO. nano Server.cfg Server configuration Settings in Server.cfg This is the general server config file. Each variable should be on its own line. New additions will be added to this wiki. Since we do not overwrite config files you will need to manually add them to your existing server config if you wish to alter the default value. ServerName="Squad Dedicated Server" IsLANMatch=false ShouldAdvertise=true MaxPlayers=40 NumReservedSlots=0 NumPlayersDiffForTeamChanges=3 AllowTeamChanges=true PreventTeamChangeIfUnbalanced=true EnforceTeamBalance=true RejoinSquadDelayAfterKick=180 ServerMessageInterval=300 ServerPassword=Password AutoTkBanTime=1209600 RecordDemos=false VehicleClaimingDisabled=false VehicleKitRequirementDisabled=false AllowQA=false // Forced on for Licensed servers (Only OWI staff & qa are admins) AllowCommunityAdminAccess=false // Forced on for Licensed servers (Only OWI devs) AllowDevProfiling=false PORTS TO OPEN Port = Game port = UDP (Default 7787, 7788 UDP) Need to be open on Windows firewall and router. QueryPort = Steam query port = UDP (Default 27165 UDP) QueryPort+1 = Second Steam query port = UDP and TCP (Default 27165, 27166, 27167 UDP and TCP) FILES Admins.cfg Bans.cfg License.cfg MapRotation.cfg Rcon.cfg RemoteAdminListHosts.cfg RemoteBanListHosts.cfg Server.cfg ServerMessages.cfg ADDING ADMINS IN ADMIN.CFG Admins are now created by groups and groups are assigned to admins. You can create as many groups as you want with any types of permissions. All the permissions will be in the config file commented out. These files will not be over writeable so when we add new permissions you will need to check here or the wiki for updates. The below are just examples. Please note that it needs to be SteamId64. You can convert your ID at steamid.io/lookup/ Group=SuperAdmin:changemap,cheat,private,balance,chat,kick,ban,config,cameraman,debug,pause Group=Admin:changemap,balance,chat,kick,ban,cameraman,pause Group=Moderator:changemap,chat,kick,ban Admin=76561115695178:Moderator //Player 5 Admin=8915618948911:Moderator //Player 4 Admin=7894591951519:Admin //Player 3 Admin=7984591565611:SuperAdmin //Player 2 Admin=917236241624:SuperAdmin //Player 1 Admin=45365435431:Admin //Player 8792 Map Rotation in MapRotation.cfg Logar Kohat OP First Light Chora Fool's Road Sumari Gorodok Yehorivka Mestia Kokan Narva Al Basrah Belaya If you want a specifc map version you can add the below into the rotation file Al Basrah Al Basrah AAS v1 Al Basrah Conquest v1 Al Basrah INS v1 Al Basrah Invasion v1 Al Basrah Invasion v2 Al Basrah PAAS v1 Al Basrah PAAS v2 Belaya Belaya AAS v1 Belaya AAS v2 Belaya AAS v3 Belaya Invasion v1 Belaya Invasion v2 Belaya PAAS v1 Chora Chora AAS v1 Chora AAS v1 INF Night Chora AAS v2 Chora Conquest v1 Chora INS v1 Chora Invasion v1 Night Chora PAAS v1 Fool's Road Fool's Road AAS v1 Fool's Road AAS v1 INF Fool's Road AAS v2 Fool's Road AAS v3 Fool's Road AAS v4 Fool's Road Conquest v1 Fool's Road Skirmish Gorodok Gorodok AAS v1 Gorodok AAS v1 INF Gorodok AAS v2 Gorodok AAS v3 Gorodok AAS v4 Gorodok Invasion v1 Gorodok Invasion v2 Jensen's Range Kamdesh Kamdesh AAS v1 Kamdesh AAS v1 INF Kamdesh INS v1 Kamdesh Invasion v1 Kamdesh Invasion v2 Kamdesh PAAS v1 Kohat Kohat AAS v1 Kohat AAS v1 INF Kohat AAS v2 Kohat INS v1 Kohat Invasion v1 Kokan Kokan AAS v1 Kokan AAS v2 Kokan INS v1 Kokan PAAS v1 Logar Logar PAAS V1 Logar Valley AAS v1 Logar Valley AAS v1 INF Logar Valley INS v1 Logar Valley INS v1 Night Mestia Mestia AAS v1 Mestia AAS v2 Mestia Invasion v1 Mestia Invasion v2 Mestia PAAS v1 Narva Narva AAS v1 Narva AAS v2 Narva AAS v3 Narva Invasion v1 Narva PAAS v1 Narva PAAS v2 OP First Light OP First Light AAS v1 Sumari Sumari AAS v1 Sumari AAS v1 INF Sumari AAS v2 Sumari AAS v3 Sumari INS v1 Sumari ITC v1 Yehorivka Yehorivka AAS v1 Yehorivka AAS v1 INF Yehorivka AAS v2 Yehorivka AAS v3 Yehorivka Invasion v1 Yehorivka Invasion v2 When you're done, save the file with ctrl+o and then enter. Exit nano with ctrl+X. Start your server ./startserver1.sh Screen allows the server to run even if you've shut down your SSH session (putty). STOPPING SERVER: SSH to your linux server as the user running the squadserver. (Not root) Once in the terminal, open up the screen for said server instance, in above example called server1 screen -r server1 You will now see the SquadServer log window, press CTRL+C and it will shut the server down. After that you can start it again with your start command.
-
REQUIREMENTS for WINDOWS Visual C++ Redistributable for Visual Studio 2013 vc_redist.x64.exe Visual C++ Redistributable for Visual Studio 2015 vc_redist.x64.exe DirectX End-User Runtimes (June 2010) WINDOWS 1. Download SteamCmd and extract to your preferred directory. 2. Open SteamCmd or create a file called "update server.bat" with the following contents. SET STEAMCMD="C:\steamcmd\steamcmd.exe" %STEAMCMD% +login anonymous +force_install_dir "C:\servers\squad_server" +app_update 403240 validate 3. Run the .bat file to install the server files. When the installation is complete, you can close the window. 4. Go to the server folder ("C:\servers\squad_server"), and create a new file called "start.bat" with the following contents. This is the file you will use to start the server. start SquadServer.exe Port=7787 QueryPort=27165 FIXEDMAXPLAYERS=80 RANDOM=ALWAYS -log Your server is now installed, however you must still configure your network to allow players to connect to your server from the internet. You can find Squad's connection ports in the "Ports to Open" section below. Directions for port forwarding will be dependent on your model router / network setup. Further info on server setup and configuration can be found in their respective sections on this page. Server configuration Settings in Server.cfg This is the general server config file. Each variable should be on its own line. New additions will be added to this wiki. Since we do not overwrite config files you will need to manually add them to your existing server config if you wish to alter the default value. ServerName="Squad Dedicated Server" IsLANMatch=false ShouldAdvertise=true MaxPlayers=40 NumReservedSlots=0 NumPlayersDiffForTeamChanges=3 AllowTeamChanges=true PreventTeamChangeIfUnbalanced=true EnforceTeamBalance=true RejoinSquadDelayAfterKick=180 ServerMessageInterval=300 ServerPassword=Password AutoTkBanTime=1209600 RecordDemos=false VehicleClaimingDisabled=false VehicleKitRequirementDisabled=false AllowQA=false // Forced on for Licensed servers (Only OWI staff & qa are admins) AllowCommunityAdminAccess=false // Forced on for Licensed servers (Only OWI devs) AllowDevProfiling=false PORTS TO OPEN Port = Game port = UDP (Default 7787, 7788 UDP) Need to be open on Windows firewall and router. QueryPort = Steam query port = UDP (Default 27165 UDP) QueryPort+1 = Second Steam query port = UDP and TCP (Default 27165, 27166, 27167 UDP and TCP) FILES Configuration files are located in C:\servers\squad_server\Squad\ServerConfig\ Configuration files located in this directory are: Admins.cfg Bans.cfg License.cfg MapRotation.cfg Rcon.cfg RemoteAdminListHosts.cfg RemoteBanListHosts.cfg Server.cfg ServerMessages.cfg ADDING ADMINS IN ADMIN.CFG Admins are now created by groups and groups are assigned to admins. You can create as many groups as you want with any types of permissions. All the permissions will be in the config file commented out. These files will not be over writeable so when we add new permissions you will need to check here or the wiki for updates. The below are just examples. Please note that it needs to be SteamId64. You can convert your ID at steamid.io/lookup/ Group=SuperAdmin:changemap,cheat,private,balance,chat,kick,ban,config,cameraman,debug,pause Group=Admin:changemap,balance,chat,kick,ban,cameraman,pause Group=Moderator:changemap,chat,kick,ban Admin=76561115695178:Moderator //Player 5 Admin=8915618948911:Moderator //Player 4 Admin=7894591951519:Admin //Player 3 Admin=7984591565611:SuperAdmin //Player 2 Admin=917236241624:SuperAdmin //Player 1 Admin=45365435431:Admin //Player 8792 Map Rotation in MapRotation.cfg Logar Kohat OP First Light Chora Fool's Road Sumari Gorodok Yehorivka Mestia Kokan Narva Al Basrah Belaya If you want a specifc map version you can add the below into the rotation file Al Basrah Al Basrah AAS v1 Al Basrah Conquest v1 Al Basrah INS v1 Al Basrah Invasion v1 Al Basrah Invasion v2 Al Basrah PAAS v1 Al Basrah PAAS v2 Belaya Belaya AAS v1 Belaya AAS v2 Belaya AAS v3 Belaya Invasion v1 Belaya Invasion v2 Belaya PAAS v1 Chora Chora AAS v1 Chora AAS v1 INF Night Chora AAS v2 Chora Conquest v1 Chora INS v1 Chora Invasion v1 Night Chora PAAS v1 Fool's Road Fool's Road AAS v1 Fool's Road AAS v1 INF Fool's Road AAS v2 Fool's Road AAS v3 Fool's Road AAS v4 Fool's Road Conquest v1 Fool's Road Skirmish Gorodok Gorodok AAS v1 Gorodok AAS v1 INF Gorodok AAS v2 Gorodok AAS v3 Gorodok AAS v4 Gorodok Invasion v1 Gorodok Invasion v2 Jensen's Range Kamdesh Kamdesh AAS v1 Kamdesh AAS v1 INF Kamdesh INS v1 Kamdesh Invasion v1 Kamdesh Invasion v2 Kamdesh PAAS v1 Kohat Kohat AAS v1 Kohat AAS v1 INF Kohat AAS v2 Kohat INS v1 Kohat Invasion v1 Kokan Kokan AAS v1 Kokan AAS v2 Kokan INS v1 Kokan PAAS v1 Logar Logar PAAS V1 Logar Valley AAS v1 Logar Valley AAS v1 INF Logar Valley INS v1 Logar Valley INS v1 Night Mestia Mestia AAS v1 Mestia AAS v2 Mestia Invasion v1 Mestia Invasion v2 Mestia PAAS v1 Narva Narva AAS v1 Narva AAS v2 Narva AAS v3 Narva Invasion v1 Narva PAAS v1 Narva PAAS v2 OP First Light OP First Light AAS v1 Sumari Sumari AAS v1 Sumari AAS v1 INF Sumari AAS v2 Sumari AAS v3 Sumari INS v1 Sumari ITC v1 Yehorivka Yehorivka AAS v1 Yehorivka AAS v1 INF Yehorivka AAS v2 Yehorivka AAS v3 Yehorivka Invasion v1 Yehorivka Invasion v2
-
Were proud to announce we now have a Dedicated Arma 3 Server! Thanks to the awesome work by MuRdeRoNYoBloCk , We now have a up and running Dedicated Server in Arma 3 Please note: Server name does change frequently.. GAME MODE DETAILS: The area has fallen to the enemy, and it is up to you to take it back. Embark with your teammates on a persistent campaign that will span several weeks of real time to liberate all the major cities of the area. Experience a massive CTI campaign with up to 200 different capture-able settlements across the entire area Cooperative game-play for up to 64 players A commander role to take care of the planning, production, logistic and AI commanding Recruit-able AI troops to fill the gaps Buy troops and vehicles using three different types of resources Build the FOB of your dreams with an in-game "what you see is what you get" system Fight aggressive and cunning hostile forces who react and adapt to your actions Learn that every window is a threat thanks to the custom urban combat AI Accomplish meaningful secondary objectives that will benefit your progression Never lose your progress with the built-in server-side save system The server will remain public, and can be used for our M1GC members crew and the public for practicing and plain ol arma 3 fun. Please note: There may be random players, If you experience any issue, Please be sure to contact us asap so we may initiate any kicks or bans to avoid future discrepancies... Check the [M1GC] Arma 3 Dedicated Server stats & mods we use here.
-
Instructions (Windows o/s) The easiest way to install a Arma 3 Server on windows is by installing steam, and Selecting tools in Steam. Then download the Arms 3 Dedicated Server which will download and setup all the above files listed below... You will still need to configure the Arma 3 Server so once installed, Check the Instructions below. Manual Configuring The following instructions will guide you through setting up one Arma 3 server on 1 box, however they will also set the foundations for installing multiple servers on that same box Install the latest version of DirectX Create the following empty directories D:\Apps\Steam D:\Games\ArmA3\A3Master D:\Games\ArmA3\A3Files Download steamcmd.exe and save it to your targeted Steam install directory (E.g D:\Apps\Steam) Run the steamcmd.exe. (This will download and install the required steam files to your custom steam directory) Create an #Arma3server_steamcmd_example.cmd file and save it to D:\Games\ArmA3\A3Files Run the #Arma3server_steamcmd_example.cmd file Just after logging into Steam, the console window will hang and ask for a validation key Steam will have automatically sent you an email with this validation code, which you then need to input at the command prompt The Update console window should then continue to run and install ArmA3 ((DEV or STABLE) version to the target directory as defined in the .cmd file) eg (D:\Games\ArmA3\A3Master) Create a shortcut for the ArmA3Server.exe on the server desktop Add the following parameters to the Target Line in the shortcut tab of the newly created desktop shortcut. -port=2302 (Required if running multiple server instances including any previous ArmA2 instances) "-profiles=d:\Games\Arma3\A3Master" -config=CONFIG_server.cfg -world=empty So it should look something similar to the following: "D:\Games\Arma3\A3Master\arma3server.exe" "-profiles=d:\Games\Arma3\A3Master" -port=2302 -config=CONFIG_server.cfg -world=empty Setup the #Port Forwarding in your firewall accordingly Create a simple Notepad document called "CONFIG_server.cfg" and save it to the root folder of your ArmA3 install on the server D:\Games\ArmA3\A3Master Starting the Arma 3 Dedicated Server Start up your shortcut, check the server runs. (You will see a console pop up in your desktop after a few seconds) Close the console window down, then you will need to edit the following files which will have been automatically created. D:\Games\Arma3\A3Master\Users\Adminstrator\Administrator.Arma3Profile D:\Games\Arma3\A3Master\Users\Administrator\Arma3.cfg Restart the server Start up your client Arma3.exe (Running the same branch as the server, (eg Stable or DEV) and you should then be able to see your server in the server browser (Filters are available to reduce the server list) Login to your server using the password you defined in #CONFIG_server.cfg by typing "/" to open the chat window, then type (#login ADMINPASSWORD) followed by Enter Warning: Make sure you never forget the '#' in front of any server command! Once logged in you will be presented with a mission list, select one of the missions to start the game Prove the stability of your server by running BIS missions initially before you start adding user made content
-
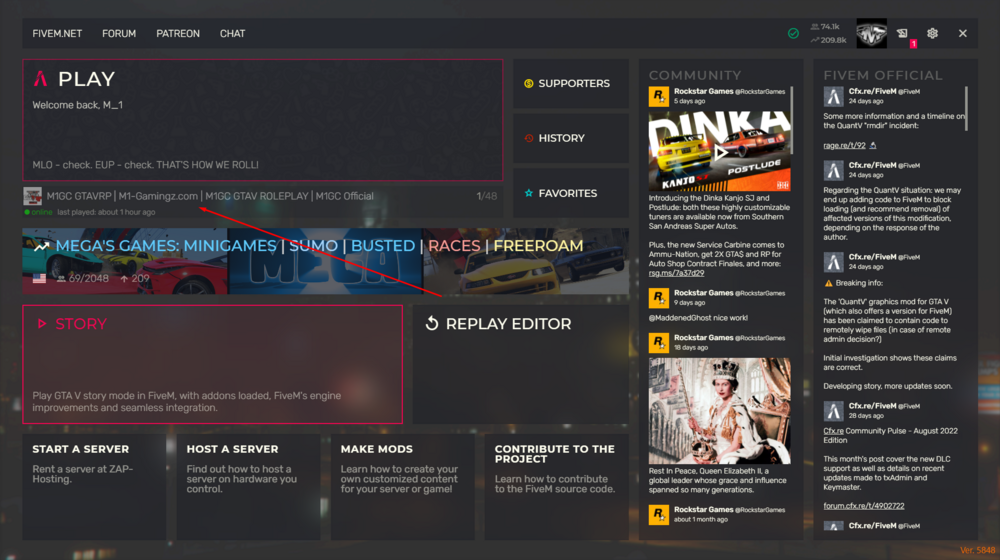
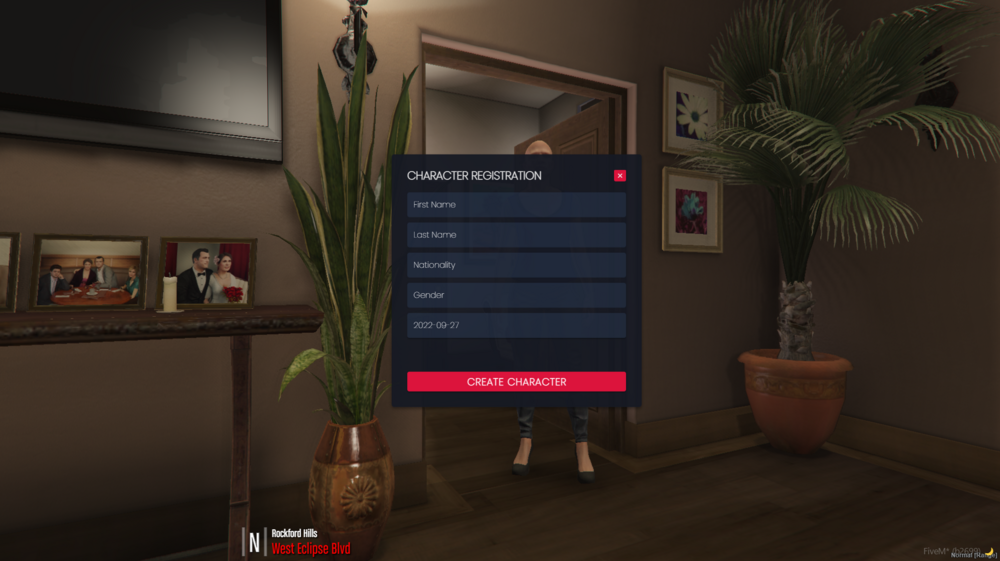
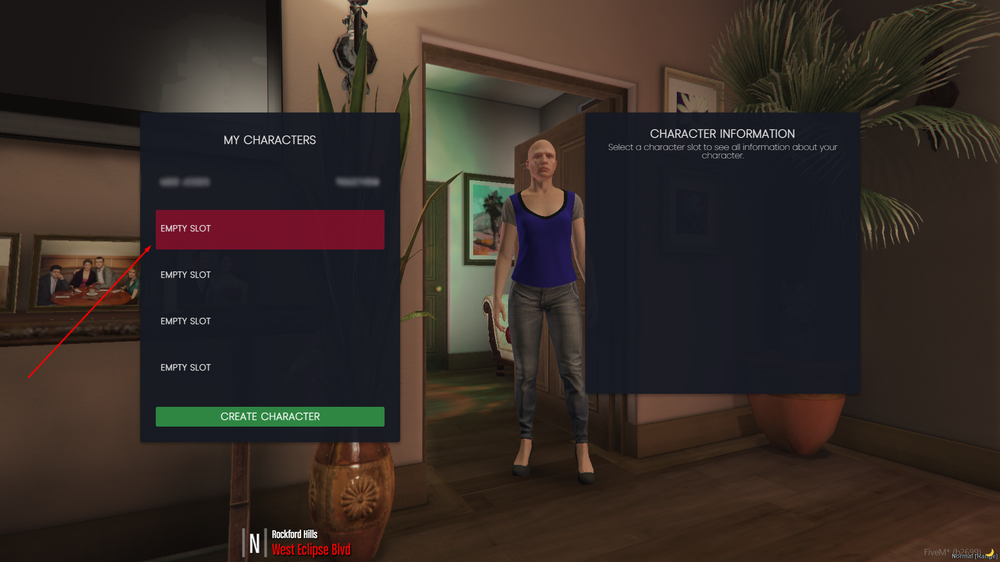
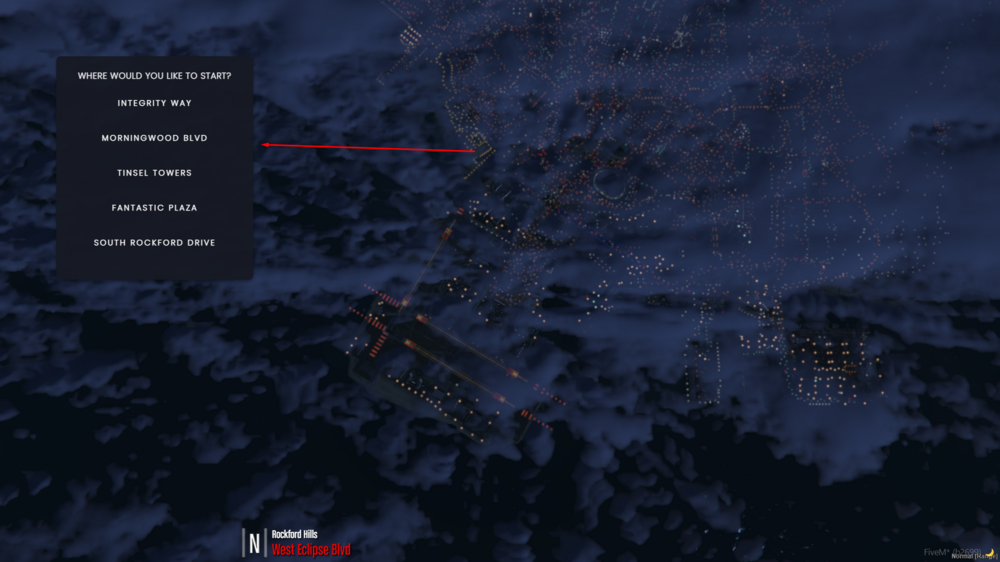
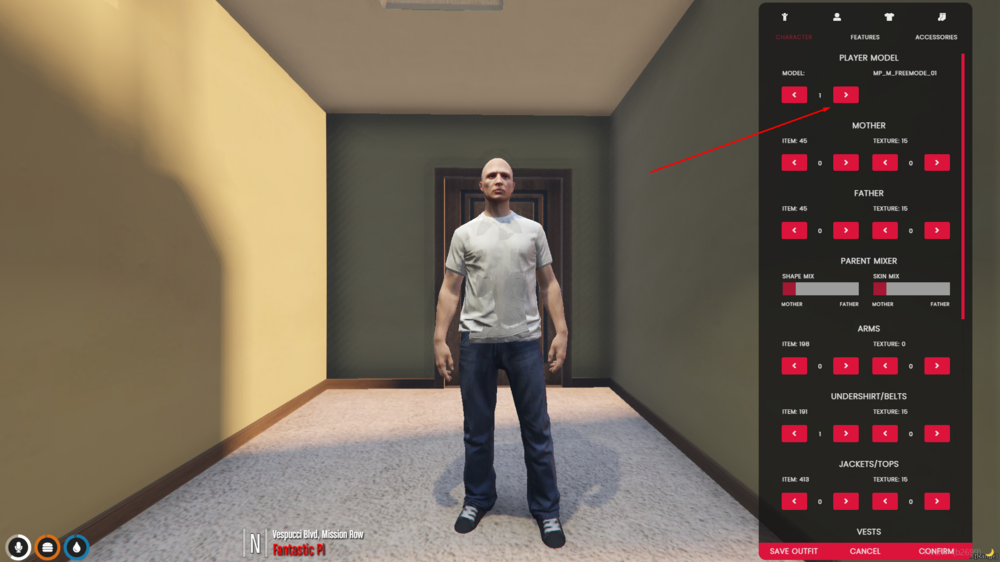
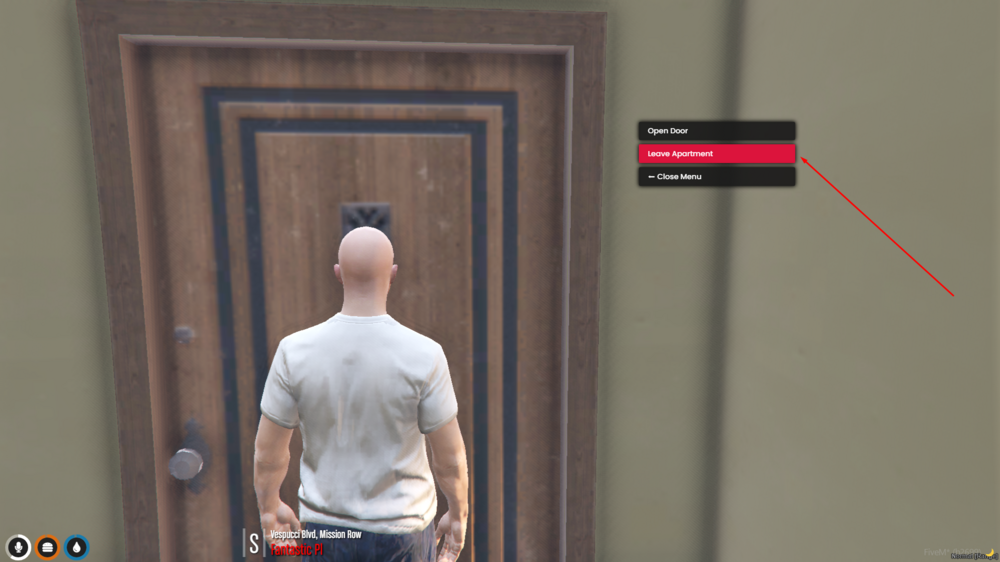
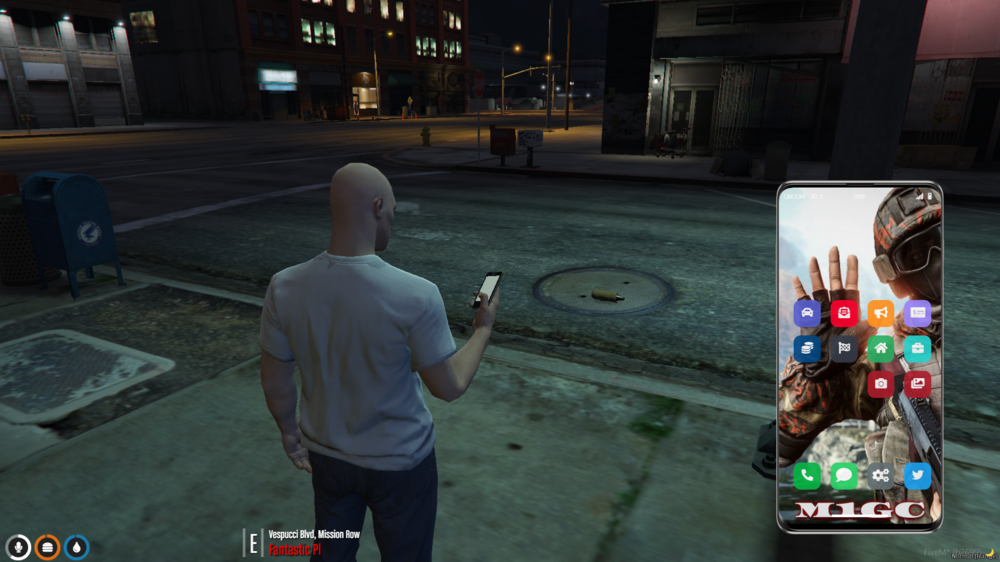
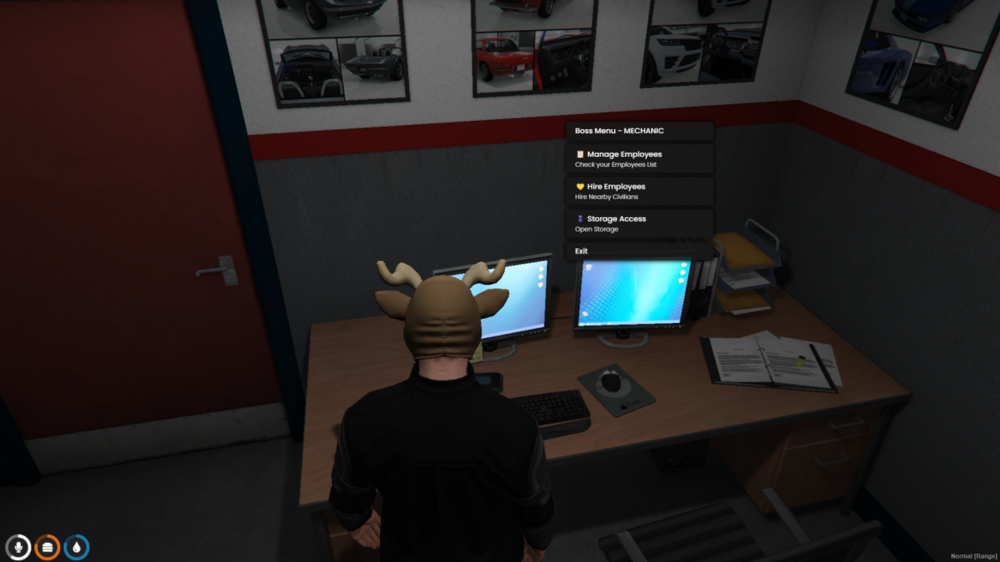
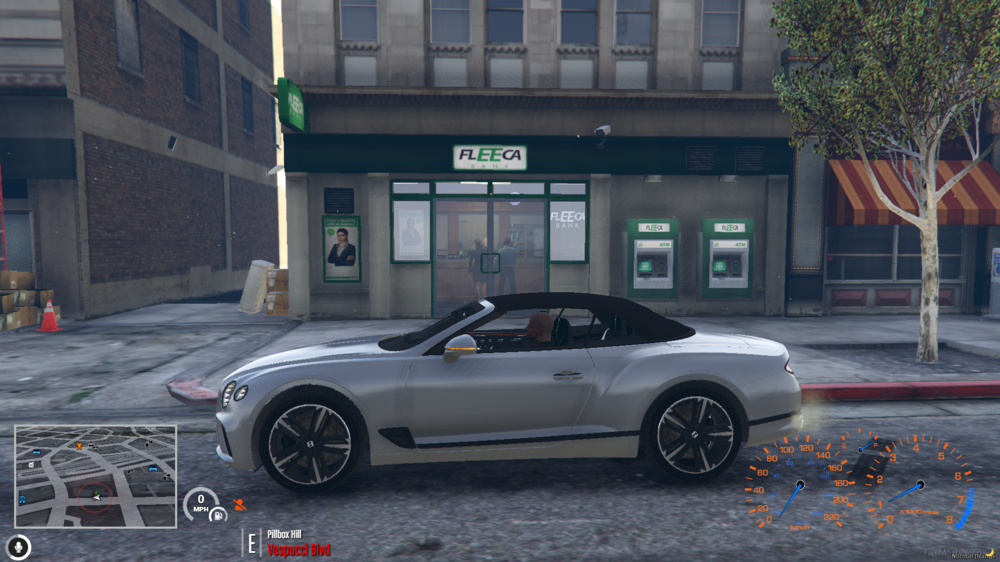
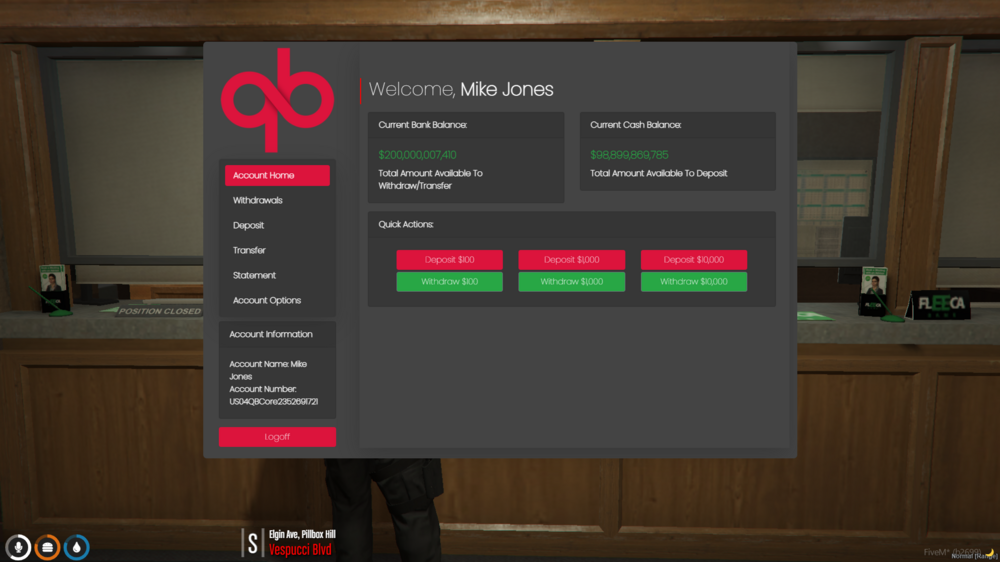
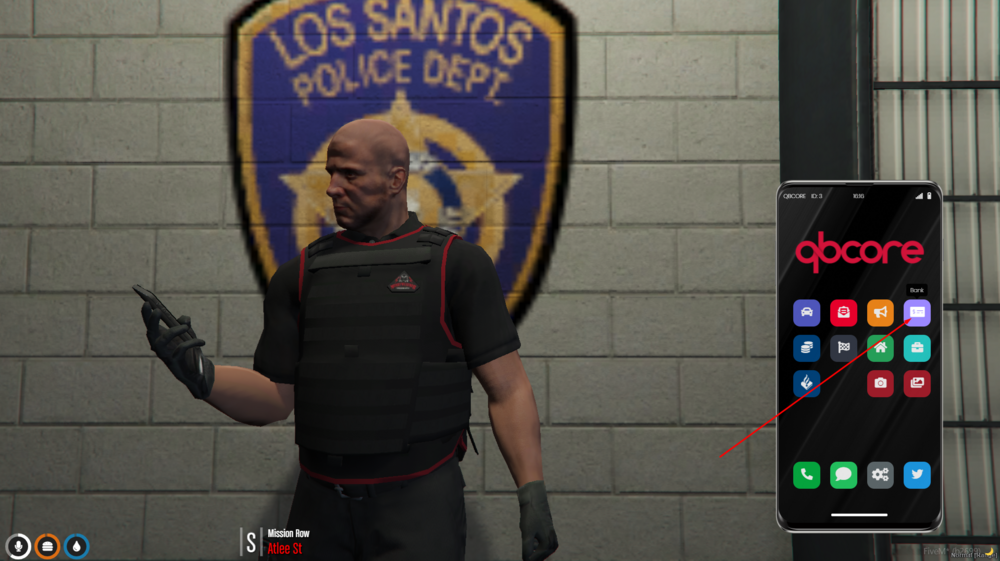
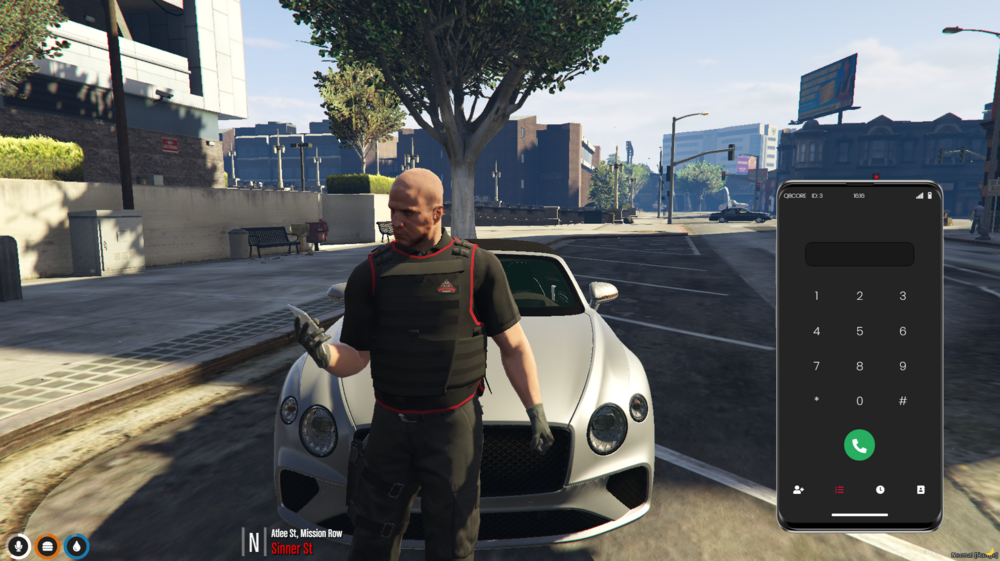
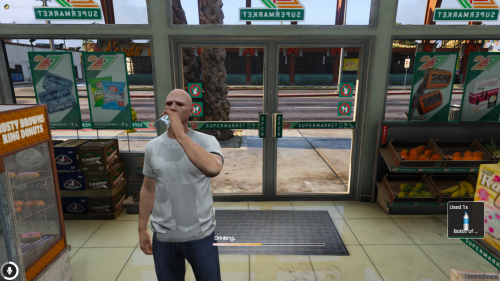
About the M1GC GTAV RP - FIVEM Server M1GC GTAV RP - FIVEM Server was launched as a supported game in order to expand the opportunities provided to members and gamers that hang around M1GC as well to provide a sucker free GTAV FiveM server, one of M1GC’s key qualities. The basic idea of FiveM is to introduce a great mod-ed multiplayer experience for those who play Grand Theft Auto V. M1GC has decided to take the challenge of opening a roleplay server where players can live a normal life, whether it be collecting a paycheck, buying a car, robbing banks, or even saving lives as a cop, or paramedic. This article will provide the information you need to understand how our server works. The M1GC FiveM server provides a civilian experience where a trainer (or mod menu) is not required. This means all you have to do is install FiveM, & join our server to play! M1GC GTAVRP FiveM Server: https://cfx.re/join/4pzyov and start playing! (Serious Player Only) (NOTE: WANT TO JUST HAVE FUN - NO ROLEPLAY, CHECK OUT OUR: M1GC FIVEPD & FREEROAM SERVER) First Join When you originally join our server, you will visit the Character Information screen, and be given an option to create a new character on a empty slot, You can create up to x5 separate Characters Once you Select a Character slot, select Create Character to continue, Character Registration, Enter a first and last name, date of birth, gender, and d.o.b. Now select and Apartment Complex you wish to live in. Customizing your Character Select a Character from the Default Custom Characters we add into the server and click Confirm to save your character. Clothing & Clothing Stores If you ever want to customize your look on the server, you can visit any of the clothing stores on the map. Walk into them and visit the circle in the store. You will have a menu to open and it is self-explanatory from there. Once you complete your character, you will now be free to roam your apartment, which will contain a Stash, and Clothing Dresser, were you can stash items, money, and change clothes. Exit your apartment by selecting Leave Apartment to start roaming the city. Getting Around There are many methods of getting around Los Santos. You could walk, bike, ride or drive in order to get to where you need to go. All parked vehicles will be locked, but you can steal parked vehicles by using lockpicks, Moving vehicles will be unlocked, You can steal a moving vehicle by yanking AI drivers out of there vehicle or if you have a Weapon, You can also CarJack drivers by aiming you gun at the driver. Be-Aware, these actions will alert police players in game of illegal activity. In order to get a bike/motorcycle, visit the car dealership (Simeon’s Dealership). In there you will find a car or motorcycle to purchase yourself a vehicle. If you don't have the money, you could also finance a vehicle. (will be covered more later in the guide). Can’t afford anything? Call for a taxi using your phone (M). Note that someone must be in the taxi driver job in order for you to get a response. You can also call for a ride in chat as some people do these as side jobs, such as an Uber. EATING DRINKING AND HEALTH Your character will get hungry, thirsty and lose stamina and health if doing to many stressful things such as running, driving fast, crashing while driving. Be sure to keep and eye on on health and visit stores for food, snacks, lighters, rolling papers, alcohol, and regular beverages, and visit hospitals for bandages and health / healing / revival products. If you get seriously injured, you will bleed out and eventually die. Only EMS and nearby players can revive you, so be very careful not to injure yourself to the point of death. If you die, you can be revived and respawned in the hospital for a small fee. Jobs If you wish to work, Visit City Hall For legit jobs. Want to work Illegally, You can either do some drug smuggling, sell cars. crypto, hotdogs, traffic drugs, drug distribution, or rob stores. When you rob a store or jewelry place, the police will be alerted. Any money received from doing illegal activities can be used to purchase drugs or pawnshop items. You can also sell to Pawnshops. Dealers and Gang Leaders can only sell drugs. All other jobs (Cop, Lawyers, Taxis, Real Estate Agents, Gangs, Mechanics, and Medic's) are whitelisted and require that you submit an application to those departments. Bank Accounts All players also have access to an account through Maze Bank. Just visit an ATM or bank to deposit/withdrawal money to and from your bank account. The bank has a UI to help you understand the process better and allows for the trading of funds between players and allows also trading and buying of crypto. You can also open / check / transfer and withdraw fund to and from your bank account via your cell phone. Mobile Phone Your phone functions as a phone would in real life, it allows you to message / call for services, other players, allows for calling other players for illegal activities, races, trade and also allows for and legal trade. Phone can take photos, checking on your houses, cars, call for services, setup races, check servers, add players to your contacts, check announcements, message other players in whatsapp looking format, allows to customize the phone, send in game tweets, and much more. You phone number and phone's serial number is Unique, Be sure to give out your phone number to other players. Phone works with your mic, so be sure to setup your microphone via game to be able to talk and listen to other players via your phone. Vehicles and Custom Vehicles Purchasing a Vehicle Once you have collected enough money, you can visit the vehicle shop at Simeon’s car dealership in downtown LS. Vehicles vary in price so it may be wise to visit the store before hand to get an understanding of how much money you will need. Once you have purchased your car, it is will become registered to you. You will own the keys to the car, and license plate will be tied to you. This means that your name will come back whenever the plate is run by a police officer. If your vehicle is not registered, you may be taken to jail or cited for no registration. Be sure to lock your vehicle so no one else can have an easy time stealing it. Cars can be stolen with lockpicks, so be aware and be sure to park your car in your house garage or public garage. Insurance (aka the Impound) All vehicles are automatically insured and are recoverable by their owners. If you lose your car or time out and your car is gone and is marked “Out” in the garage, you can go to the impound icon on the map and recover your car for a fee. If your vehicle is impounded by the police (meaning a tow truck driver tows it), you can recover your vehicle for a cheaper price from them in most instances. Customizing & Repairing your Car Once you have your car, you can visit the Los Santos Customs marked on the map to deck out your car. There are a variety of options that cost different amounts. You CAN preview things prior to you actually purchasing them (so you can go through colors, window tints, etc. without actually selecting them). All modifications, including those done by others to your vehicle, will be saved to your car’s configuration the next time you take it out. Storing and Pulling out your Vehicles: Once you purchase your vehicle, you can store it in one of the many Garages (blue garages on the map up found in Legion Square and up in Paleto Bay). We HIGHLY recommend you do this prior to leaving the server that way your vehicle is safely stored. Once you store your vehicles, you can also pull them back out of the garage. It is important to note that if you do not put the car back in the garage, it will not return into the garage until the server is restarted and may be impounded. Vehicle Mechanics: There are two tools provided to players when it comes to your vehicles. They are fuel and vehicle controls. First, all vehicles have a fuel meter that can be found in the lower right-hand corner and on the lower left-hand to the right the minimap (displayed as a percentage). It is important you do not let that get all the way down or your vehicle will start stuttering and will shut off. Vehicles will experience realistic damage. In order to refuel, simply go to any of the gas can symbols on the map and pull up next to the pump and follow the instructions to add gas to your vehicle. Weapons Buying Weapons: In addition to buying vehicles, you can also buy weapons at the weapon shops on the map. These are marked by the marker titled “Ammunation.” To buy weapons, you will require a weapon license, visit city hall to buy one. Then visit a Weapon Shop, simply walk up to the shop owner (usually inside) and follow the prompt. Guns are realistic, they take time to pull out, reload, and will have realistic like sounds and animations when holstering and arming yourself. Weapons can also be used for: – Robbing stores and Players - Protection – Selling drugs – Gathering from other criminals Side Notes 1.The time, weather, traffic density, and ped density are all synced throughout the server. Individual players can not change their time on their own end. MORE INFORMATION ON M1GC GTAV RP FEATURES AND ECONOMY WE LEFT OUT COMING SOON STORES FEATURES AND MECHANICS DRUGS FEATURES AND MECHANICS MONEY FEATURES AND MECHANICS GAS FEATURES AND MECHANICS PLAYER HEALTH, THIRST, FEATURES AND MECHANICS VEHICLE FEATURES AND MECHANICS GUN FEATURES AND MECHANICS VEHICLE AND GARAGE LOCKING FEATURES AND MECHANICS EMERGENCY AND SERVICES VEHICLES AND MECHANICS CUSTOM ITEMS AND MECHANICS HOUSE GARAGE FEATURES AND MECHANICS INVENTORY FEATURES AND MECHANICS GANGS FEATURES AND MECHANICS POLICE FEATURES AND MECHANICS EMS FEATURES AND MECHANICS LAWYERS FEATURES AND MECHANICS TAXIS FEATURES AND MECHANICS MECHANICS FEATURES AND MECHANICS CHAT COMMAND FEATURES AND MECHANICS AND MUCH MORE WE DIDNT TOUCH ON WILL BE ADDED...
-
CIVILIANS AND GANGS Positions available in the following Departments & basic requirements. STREET GANG LEADERS - Leads Illegal Gang operations in game. BIKE LIFE GANG LEADERS - Leads a biker gang. MAFIA LEADERS - Leads Illegal Mafia Operations in game. CIVILIANS - Free to roam the city without the need of being in a Gang. TAXI / UBER / LYFT Positions available in the following Departments. TAXI DRIVER - Picks up players who need a ride in game MECHANICS Positions available in the following Departments & basic requirements. AUTOMOTIVE MECHANIC - Fixes up players ride who may have damage Players can repair vehicles auto in repair shop LAWYERS & JUDGES Positions available in the following Departments & basic requirements. LAWYERS - Handles Players Tickets, Speaks to Judges JUDGES - Hands out players Jail Sentences REAL ESTATE Positions available in the following Departments & basic requirements. REAL ESTATE AGENT - Handles the selling of a House to players GARAGE - Real estate agents can create houses and garages for houses. DEALERS - can create drug dealers around the city. CAR DEALERS Positions available in the following Departments. CAR DEALER - Dealership Car Dealer, handles selling of custom cars. This position is automated and doesn't require a player EMS Active Departments Positions available in the following Departments. EMS AMBULANCE DRIVER - Drives the Ambulance in an event of Emergencies. EMS Worker - Handles the healing/reviving of injured players. This position has been automated and replaced with a Revive script. POLICE Active Departments Positions available in the following Departments. Police - Patrols the servers for illegal activity Communications Dept./911 Dispatcher - Dispatches crimes over discord/teamspeak. Prison Workers - Keeps prisoners in jail Active Divisions Traffic Police Recruits Undercover Helicopter-Unit 911 Dispatcher Bike Unit Custom Features Custom LEO/EMS/CIV cars and trucks Custom car locks, inventory, houses, gangs, police, money ems. Custom Uniforms for LEO and CIV gangs (Coming Soon) Ability to stop, search, arrest players, sell cars, houses, drugs, Requirements Leave us reply for details. English speaking only
-
LIST OF WEAPONS SPAWN NAMES CAN BE SPAWNED via vMenu - F11 “WEAPON_KNIFE” (http://gta.wikia.com/wiki/Knife 1.5k) “WEAPON_KNUCKLE” (http://gta.wikia.com/wiki/Brass_Knuckles 879) “WEAPON_NIGHTSTICK” (http://gta.wikia.com/wiki/Nightstick 617) “WEAPON_HAMMER” (http://gta.wikia.com/wiki/Hammer 439) “WEAPON_BAT” (http://gta.wikia.com/wiki/Bat 509) “WEAPON_GOLFCLUB” (http://gta.wikia.com/wiki/Baseball_Bat 269) “WEAPON_CROWBAR” (http://gta.wikia.com/wiki/Crowbar 431) “WEAPON_BOTTLE” (http://gta.wikia.com/wiki/Broken_Bottle 322) “WEAPON_DAGGER” (http://gta.wikia.com/wiki/Antique_Cavalry_Dagger 597) “WEAPON_HATCHET” (http://gta.wikia.com/wiki/Hatchet 492) “WEAPON_MACHETE” (http://gta.wikia.com/wiki/Machete 263) “WEAPON_FLASHLIGHT” (http://gta.wikia.com/wiki/Flashlight 336) “WEAPON_SWITCHBLADE” (http://gta.wikia.com/wiki/Switchblade 637) “WEAPON_PROXMINE” (http://gta.wikia.com/wiki/Proximity_Mines 468) “WEAPON_BZGAS” (http://gta.wikia.com/wiki/BZ_Gas 453) “WEAPON_SMOKEGRENADE” (http://gta.wikia.com/wiki/Tear_Gas 242) “WEAPON_MOLOTOV” (http://gta.wikia.com/wiki/Molotov_Cocktails 205) “WEAPON_FIREEXTINGUISHER” (http://gta.wikia.com/wiki/Fire_Extinguisher 412) “WEAPON_PETROLCAN” (http://gta.wikia.com/wiki/Jerry_Can 474) “WEAPON_SNOWBALL” (http://gta.wikia.com/wiki/Snowballs 198) “WEAPON_FLARE” (http://gta.wikia.com/wiki/Flare 336) “WEAPON_BALL” (http://gta.wikia.com/wiki/Ball 301) “WEAPON_REVOLVER” (http://gta.wikia.com/wiki/Heavy_Revolver 574) “WEAPON_POOLCUE” (http://gta.wikia.com/wiki/Pool_Cue 607) “WEAPON_PIPEWRENCH” (http://gta.wikia.com/wiki/Pipe_Wrench 524) “WEAPON_PISTOL” (http://gta.wikia.com/wiki/Pistol 642) “WEAPON_PISTOL_MK2” (http://gta.wikia.com/wiki/Pistol_Mk_II 753) “WEAPON_COMBATPISTOL” (http://gta.wikia.com/wiki/Combat_Pistol 518) “WEAPON_APPISTOL” (http://gta.wikia.com/wiki/AP_Pistol 576) “WEAPON_PISTOL50” (http://gta.wikia.com/wiki/Desert_Eagle 509) “WEAPON_SNSPISTOL” (http://gta.wikia.com/wiki/SNS_Pistol 599) “WEAPON_HEAVYPISTOL” (http://gta.wikia.com/wiki/Heavy_Pistol 508) “WEAPON_VINTAGEPISTOL” (http://gta.wikia.com/wiki/Vintage_Pistol 443) “WEAPON_STUNGUN” (http://gta.wikia.com/wiki/Stun_Gun 502) “WEAPON_FLAREGUN” (http://gta.wikia.com/wiki/Flare_Gun 264) “WEAPON_MARKSMANPISTOL” (http://gta.wikia.com/wiki/Marksman_Pistol 571) “WEAPON_MICROSMG” (http://gta.wikia.com/wiki/Micro_SMG 536) “WEAPON_MINISMG” (###) "WEAPON_SMG (http://gta.wikia.com/wiki/MP5 634) “WEAPON_SMG_MK2” (http://gta.wikia.com/wiki/SMG_Mk_II 630) “WEAPON_ASSAULTSMG” (http://gta.wikia.com/wiki/Assault_SMG 605) “WEAPON_MG” (http://gta.wikia.com/wiki/MG 551) “WEAPON_COMBATMG” (http://gta.wikia.com/wiki/Combat_MG 462) “WEAPON_COMBATMG_MK2” (http://gta.wikia.com/wiki/Combat_MG_Mk_II 460) “WEAPON_COMBATPDW” (http://gta.wikia.com/wiki/Combat_PDW 438) “WEAPON_GUSENBERG” (http://gta.wikia.com/wiki/Gusenberg_Sweeper 440) “WEAPON_MACHINEPISTOL” (http://gta.wikia.com/wiki/Tec-9 406) “WEAPON_ASSAULTRIFLE” (http://gta.wikia.com/wiki/AK-47 592) “WEAPON_ASSAULTRIFLE_MK2” (http://gta.wikia.com/wiki/Assault_Rifle_Mk_II 529) “WEAPON_CARBINERIFLE” (http://gta.wikia.com/wiki/Carbine_Rifle 641) “WEAPON_CARBINERIFLE_MK2” (http://gta.wikia.com/wiki/Carbine_Rifle_Mk_II 600) “WEAPON_ADVANCEDRIFLE” (http://gta.wikia.com/wiki/Advanced_Rifle 538) “WEAPON_SPECIALCARBINE” (http://gta.wikia.com/wiki/Special_Carbine 495) “WEAPON_BULLPUPRIFLE” (http://gta.wikia.com/wiki/Bullpup_Rifle 391) “WEAPON_COMPACTRIFLE” (http://gta.wikia.com/wiki/Compact_Rifle 400) “WEAPON_PUMPSHOTGUN” (http://gta.wikia.com/wiki/Pump_Shotgun 391) “WEAPON_SWEEPERSHOTGUN” http://gta.wikia.com/wiki/Sweeper_Shotgun 453) “WEAPON_SAWNOFFSHOTGUN” (http://gta.wikia.com/wiki/Sawed-Off_Shotgun 444) “WEAPON_BULLPUPSHOTGUN” (http://gta.wikia.com/wiki/Bullpup_Shotgun 327) “WEAPON_ASSAULTSHOTGUN” (http://gta.wikia.com/wiki/Assault_Shotgun 380) “WEAPON_MUSKET” (http://gta.wikia.com/wiki/Musket 335) “WEAPON_HEAVYSHOTGUN” (http://gta.wikia.com/wiki/Heavy_Shotgun 325) “WEAPON_DBSHOTGUN” (http://gta.wikia.com/wiki/Double_Barrel_Shotgun 536) “WEAPON_SNIPERRIFLE” (http://gta.wikia.com/wiki/Sniper_Rifle 353) “WEAPON_HEAVYSNIPER” (http://gta.wikia.com/wiki/Heavy_Sniper 305) “WEAPON_HEAVYSNIPER_MK2” (http://gta.wikia.com/wiki/Heavy_Sniper_Mk_II 353) “WEAPON_MARKSMANRIFLE” (http://gta.wikia.com/wiki/Marksman_Rifle 323) “WEAPON_GRENADELAUNCHER” (http://gta.wikia.com/wiki/Grenade_Launcher 213) “WEAPON_GRENADELAUNCHER_SMOKE” (###) “WEAPON_RPG” (http://gta.wikia.com/wiki/Rocket_Launcher 248) “WEAPON_MINIGUN” (http://gta.wikia.com/wiki/Minigun 212) “WEAPON_FIREWORK” (http://gta.wikia.com/wiki/Fireworks 344) “WEAPON_RAILGUN” (http://gta.wikia.com/wiki/Railgun 359) “WEAPON_HOMINGLAUNCHER” (http://gta.wikia.com/wiki/Homing_Launcher 410) “WEAPON_GRENADE” (http://gta.wikia.com/wiki/Grenades 146) “WEAPON_STICKYBOMB” (http://www.ign.com/wikis/gta-5/Sticky_Bomb 236) “WEAPON_COMPACTLAUNCHER” (http://gta.wikia.com/wiki/Compact_Grenade_Launcher 342) “WEAPON_SNSPISTOL_MK2” (http://gta.wikia.com/wiki/SNS_Pistol_Mk_II 423) “WEAPON_REVOLVER_MK2” (http://gta.wikia.com/wiki/Heavy_Revolver_Mk_II 413) “WEAPON_DOUBLEACTION” (http://gta.wikia.com/wiki/Double-Action_Revolver 564) “WEAPON_SPECIALCARBINE_MK2” (http://gta.wikia.com/wiki/Special_Carbine_Mk_II 441) “WEAPON_BULLPUPRIFLE_MK2” (http://gta.wikia.com/wiki/Bullpup_Rifle_Mk_II 398) “WEAPON_PUMPSHOTGUN_MK2” (http://gta.wikia.com/wiki/Pump_Shotgun_Mk_II 469) “WEAPON_MARKSMANRIFLE_MK2” (http://gta.wikia.com/wiki/Marksman_Rifle_Mk_II 840) “WEAPON_RAYPISTOL” (###) “WEAPON_RAYCARBINE” (###) “WEAPON_RAYMINIGUN” (###) “WEAPON_DIGISCANNER” (https://gta.fandom.com/wiki/Digiscanner 278)
-
Feel free to join our M1GC Discord Server
-
Welcome to M1GC, If you are a new member here, welcome to the site, If you wish to create a post in any thread to contribute and share any information regarding said thread, Feel free.. Please keep all post content related to subjects / threads and avoid spamming at all cost's.... Be sure to check out our M1GC Clubs & M1GC Discord, How our M1GC Clan runs: M1GC Crews | Discord | Ranking | Clubs | Forum Rules Feel free to join our M1GC Clubs & Discord and link up with other members to game with. If your under 18 years of age, please have your parents permission or supervision to view the content on the website. Share, Like, Follow and Recruit as many members as you wish as this will be your start to joining one of our M1GC Clubs. Were still working on recruiting new members but we are steadily growing and have a scatter group of players.... Check out M1GC Clubs members we have recruited so far. Once we have enough member per game / club, we will reach out to leaders to start events etc..
-
- 2
-

-

-
M1GC Arma 3 Videos To view our Arma 3 Videos -> Click Here


